Quick Answer:
If a fixture won’t get full flow after you replaced the shutoff/angle stop, first check that the new valve is fully open and installed in the correct orientation. Common causes are a valve that isn’t full-port (many cheap stops restrict flow), debris trapped in the new valve or supply line, or a twisted/kinked flex connector. Remove the flex and flush the supply into a bucket to isolate the problem; if the valve itself is restrictive, replace it with a quality quarter-turn full-port valve.
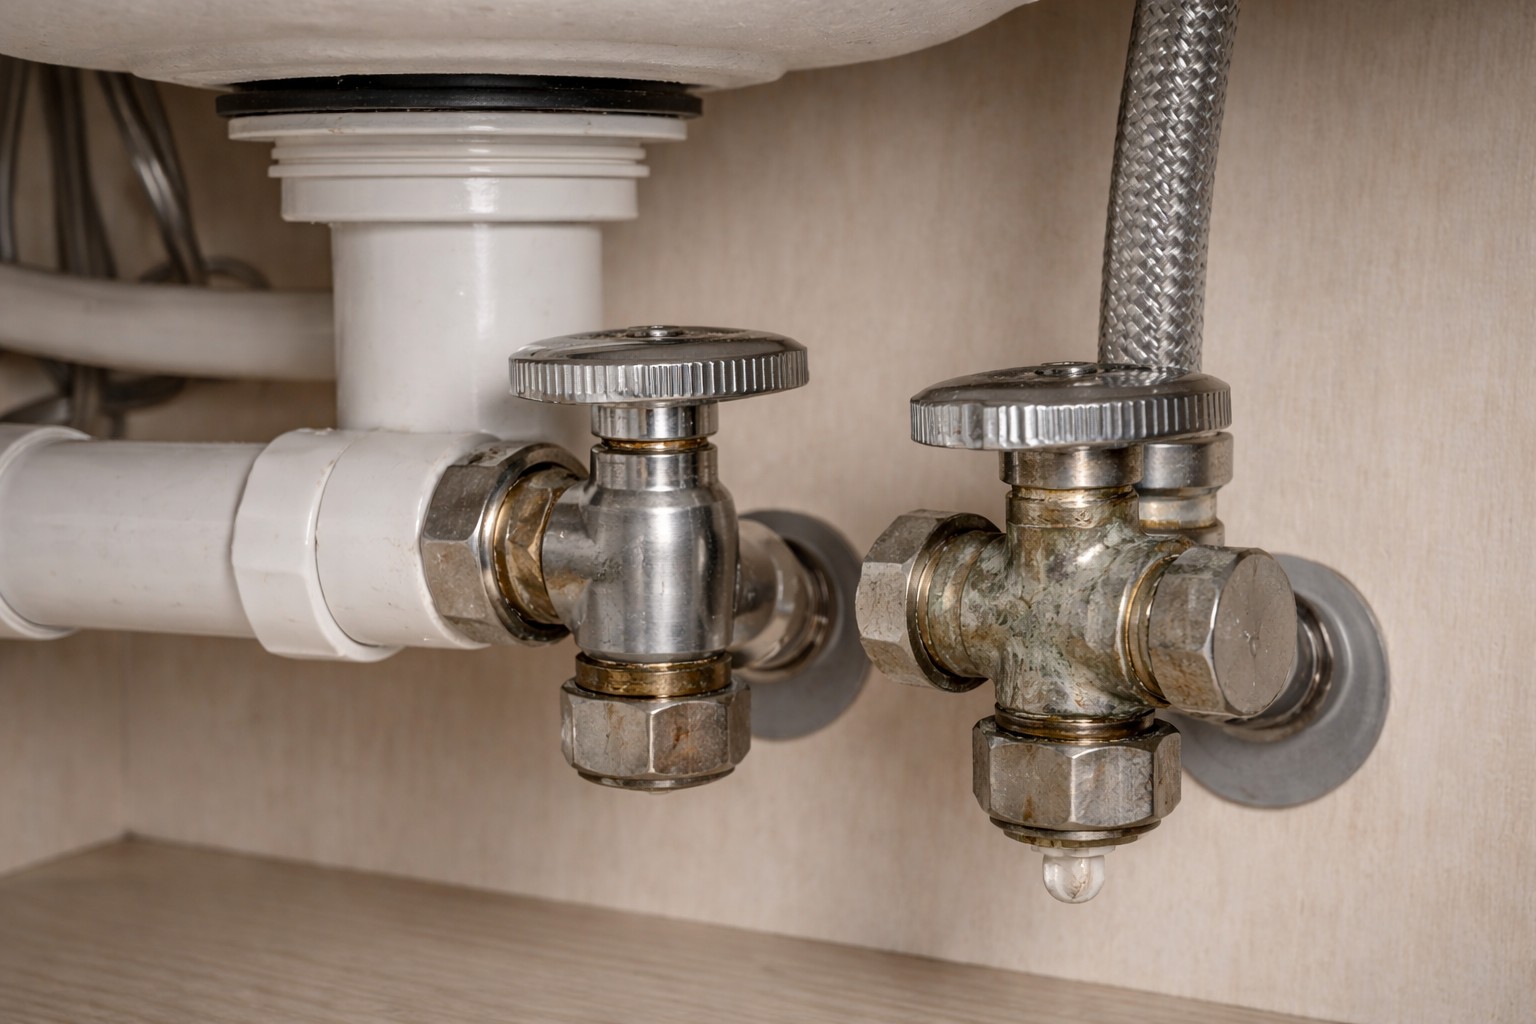
Why This Happens
- Some replacement stops are not full-port. A narrow internal bore or partial-ball design limits maximum flow even when “open.”
- Debris from the plumbing or the new valve’s manufacturing can get trapped in the valve or flex line right after installation.
- Flexible supply lines can twist or kink during installation, collapsing the flow path.
- Clogs further down at the faucet or aerator can mimic low pressure—see Fixture sprays unevenly for related causes and checks.
Step-by-Step What to Do
1. Confirm the valve is fully open and oriented correctly
- Look at the handle: a quarter-turn ball valve’s handle should be parallel to the water pipe when open. Turn it a full 90 degrees to be sure.
- For multi-turn valves, turn the screw/handle fully counterclockwise. If it still won’t open easily, don’t force it—stop and reassess.
2. Verify it’s a full-port quarter-turn
- Check the valve body for a ball-valve look (lever handle, compact body) versus a round multi-turn stop. Full-port quarter-turn valves allow full line flow; many economy multi-turn stops do not.
- If the valve is visibly a restrictive style, plan to replace it with a quality full-port quarter-turn valve.
3. Inspect the flex supply line for twist or kink
- Follow the flex line from the valve to the faucet. Straighten any twist or replace it if you see a permanent kink or flat spot.
- Replace cheap collapsed flex lines with a braided stainless connector if needed—these are less likely to compress.
4. Flush into a bucket to isolate the valve
- Place a bucket and towels under the valve. Disconnect the flex from the valve outlet (be ready for water). Open the valve briefly to flush water into the bucket and look for debris and for flow strength coming straight from the valve.
- If flow from the valve is strong with the flex removed, the flex or faucet side is the problem. If flow is weak coming directly from the valve, the valve is likely restrictive or clogged.
5. Replace the valve if internally restrictive
- If flushing shows poor flow through the valve itself or you see debris that won’t clear, replace it with a full-port quarter-turn ball valve. Use plumbers tape or approved thread sealant on threaded connections and tighten to recommended torque.
- After replacement, reconnect the flex, open the valve, and check flow at the fixture. If the fixture still sprays unevenly after fixing supply flow, check the aerator or spray head.
What Not to Do
- Don’t install a cheap multi-turn stop if you can use a quality quarter-turn—restricted valves cause permanent low flow.
- Don’t assume the faucet is the problem before you isolate the valve and supply. Test by removing the flex and flushing the valve into a bucket.
- Don’t overtighten fittings while the system is pressurized; shut the valve (or main) and relieve pressure before disconnecting plumbing.
When to Call a Professional
- If the valve leaks after installation or replacement, call a plumber—leaks under a sink can cause hidden damage.
- If you can’t isolate the flow restriction after flushing (poor flow both before and after the valve), professional diagnosis can catch hidden supply issues or upstream restrictions.
- If this low flow is limited to one fixture and you want a focused walkthrough, see Low pressure at bathroom sink only for targeted checks you can do before calling someone.
Safety Notes
- Have a bucket and towels ready before you disconnect any supply line. Expect water to flow when a connection is opened.
- If you’re unsure which valve controls the supply, shut off the house main before working on connections to avoid flooding.
- Wear eye protection when flushing lines; debris can spray unexpectedly. If you replace a valve, follow manufacturer instructions and check for leaks slowly when you first pressurize the connection.
Common Homeowner Questions
- Why did flow drop right after I installed the new valve? The new stop may be restricted, not fully open, filled with debris, or the flex line may be kinked.
- Can I flush the valve without shutting off the house water? Yes for a single fixture if you have the shutoff valve under the sink and are prepared with a bucket; if unsure, shut off the main.
- How long does it take to replace a restrictive valve? For a competent DIYer, 20–45 minutes. If soldering or if access is difficult, allow more time or call a pro.
For more related articles, see the Low Pressure at Single Fixture hub.