Quick Answer:
If you notice water on the floor while testing a newly installed water heater, stop the test, shut off the cold-water supply to the heater, and turn off the power or gas to the unit if safe to do so. Check the inlet and outlet fittings and the temperature-and-pressure (T&P) valve discharge piping for loose connections or misrouting. Look for any wetness at the tank seam and confirm there is a drain pan and a discharge line routed to a safe drain. If you see a seam leak, continuous T&P discharge, or no proper pan/drain, call a professional right away.
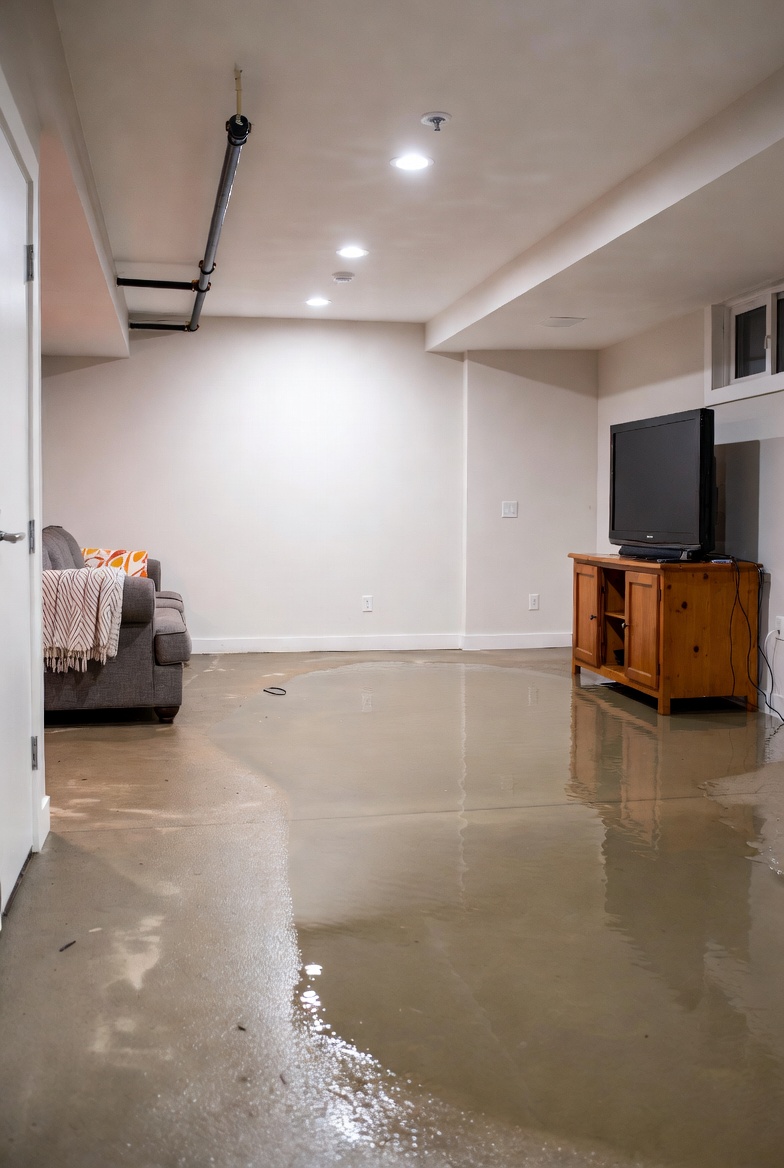
Why This Happens
Water on the floor after a new water heater is usually from one of a few sources:
- Loose or misaligned inlet/outlet fittings where supply or hot lines were connected.
- A T&P valve that was not piped to a safe drain or is releasing because pressure/temperature limits are exceeded or the valve is faulty.
- A small leak at the tank seam or a manufacturing/transport damage inside the tank.
- No drain pan or an improperly routed discharge line, so any small release ends up on the floor instead of a drain.
- Thermal expansion causing the pressure relief to weep if an expansion tank or proper check valve isn’t functioning.
Step-by-Step What to Do
1. Stop testing and isolate the unit
- Turn off the cold-water shutoff feeding the heater.
- Turn off power at the breaker for electric units, or set the gas control to pilot/off for gas units if you know how to do so safely.
2. Inspect inlet and outlet fittings
- Look at the supply and hot outlet connections for visible looseness, wet thread sealant, or pinhole leaks at the fittings.
- If you see a loose compression or threaded fitting, carefully tighten it a small amount with the appropriate wrench—don’t overtighten.
3. Check the T&P valve discharge
- Confirm the T&P valve has a rigid or properly routed discharge pipe that goes to a safe drain or the building’s floor drain and is not cut short or directed into an unsafe area.
- Look for dripping at the valve body and along the discharge pipe. A single short burst can be normal during testing, but ongoing drips mean the valve or system pressure needs attention.
4. Examine the tank seam and drain pan
- Visually inspect the tank seam near the bottom for rust, wet spots, or pinhole weeps. Even small damp patches at the seam can indicate a failing tank.
- Ensure a drain pan is installed under the tank and that it has a discharge line to a safe drain. If there’s no pan or the pan drain is missing, water will end up on the floor.
5. Verify expansion tank and check valve function
- If the system has an expansion tank, make sure it’s mounted and not completely waterlogged (a properly precharged tank will feel partially firm). If you’re unsure, note it for the professional.
- Confirm a check valve on the cold-water feed (if present) is not causing excess pressure buildup. Thermal expansion without an expansion tank or with a stuck check valve can cause the T&P to discharge.
6. Contain and dry minor leaks
- Use towels or a wet vacuum to remove standing water and place a bucket under any steady drip while you arrange repairs.
- Do not leave standing water near electrical panels, wiring, or gas fittings; keep clear and safe.
For similar plumbing problems after other work, check related advice about flooding after filter install and flooding after plumbing repair.
What Not to Do
- Don’t ignore even small drips from the T&P valve or assume the tank is fine—small leaks can become large failures quickly.
- Don’t attempt complicated repairs on a leaking tank seam; a leaking tank needs professional replacement.
- Don’t delay calling for help if you don’t have a proper drain pan and discharge routed to a safe drain—this condition risks major water damage.
When to Call a Professional
- Call a licensed plumber immediately if you find water coming from the tank seam or rust around the seam.
- Call if the T&P valve is discharging continuously or the valve body itself is leaking.
- Call if you don’t have a drain pan/drain installed, or if you’re unsure about the check valve or expansion tank setup.
Safety Notes
- Always shut off power or gas before touching plumbing that is connected to the heater. If you are not comfortable switching these off, wait for a professional.
- Be cautious of hot water and scald risk when testing valves and fittings—turn off the water to avoid burns.
- Avoid standing water near electrical components and call an electrician if water has reached electrical panels or wiring.
Common Homeowner Questions
- Q: Is a small drip from the T&P valve normal?
A: A brief drip during testing can happen, but continuous dripping is not normal and should be addressed. - Q: Can I tighten inlet/outlet fittings myself?
A: You can tighten a loose fitting slightly, but stop if you’re unsure—overtightening can cause damage and you should call a plumber if the leak persists. - Q: How long can I leave the heater shut off after I stop a test?
A: It’s fine to leave the water and power/gas off until repairs are made; just ensure the area is dry and the unit is isolated to prevent accidental use.
More in this topic
For more related fixes and similar symptoms, see Intermittent Basement Flooding Events.