Quick Answer:
If pressure changed after swapping a valve, don’t panic. First isolate the repaired component, measure pressure on both sides of the repair, and flush the affected lines to remove any debris or trapped air. These checks will often identify whether the problem is local (faulty installation, debris, partially closed valve) or upstream (system/regulator issues) and tell you whether a simple fix will restore normal pressure.
Why This Happens
When you change a valve, a few common things can cause new pressure problems:
- Debris or solder scale lodged in the valve or downstream lines, restricting flow.
- Air trapped in the lines that causes sputtering or fluctuating pressure.
- The replacement valve isn’t fully open, installed backward, or the cartridge/seat is misaligned.
- An unrelated upstream issue (main feed, regulator) coincidentally shows up after work — see Pressure dropped after city line work for that scenario.
- If the work was a shower valve swap, a mismatched cartridge or blocked trim can cause a similar drop — compare with Pressure loss after new shower valve.
Step-by-Step What to Do
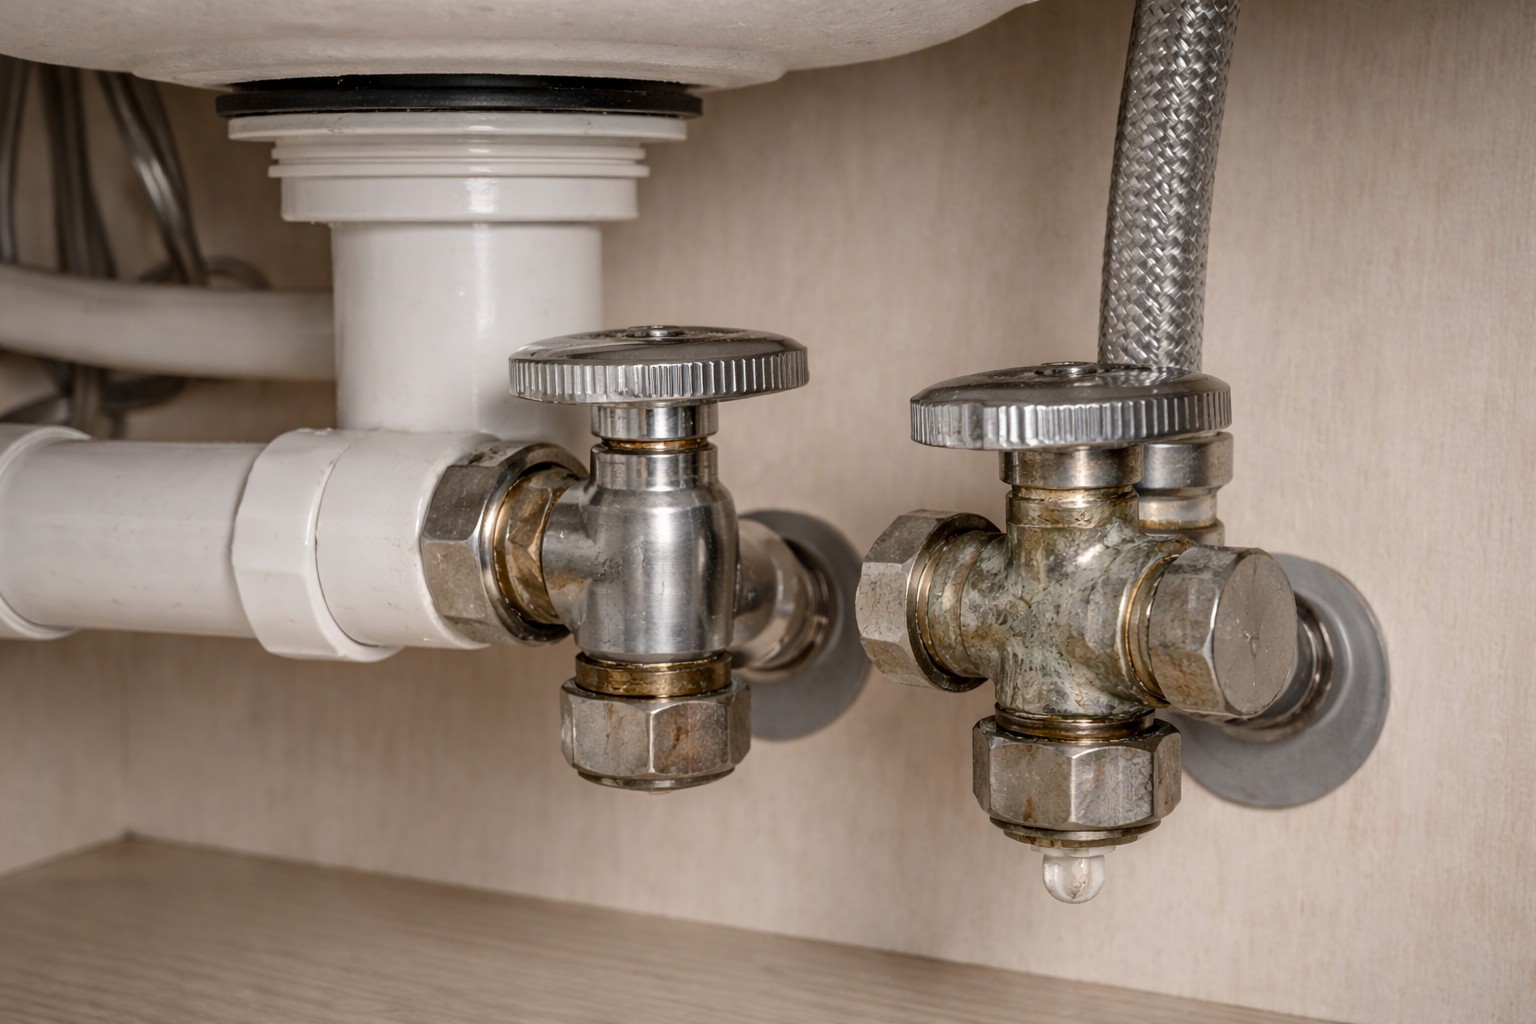
1. Isolate the repaired component
Close the isolation valves on the fixture you worked on so you can test upstream vs. downstream. If there aren’t dedicated isolation valves, shut off the main or the nearest shutoff and tag which side is supply vs. fixture.
2. Measure pressure before and after the repair point
Use a water pressure gauge on a nearby hose bib or pressure port. Record:
- Upstream pressure (supply side) with the repaired valve closed or isolated.
- Downstream pressure (fixture side) after you open the valve or the fixture.
A large difference means the valve or immediate piping is restricting flow. Similar low readings on both sides point to an upstream problem.
3. Flush the affected lines
With the supply open, run the fixture and a nearby tap for several minutes to clear debris and air. If possible, open a higher and a lower fixture to create a stronger flow path. Collect any sputtering water in a bucket to avoid making a mess.
4. Inspect and operate the valve
Check that the valve handle is fully open and that the valve body is oriented correctly. Remove aerators or shower heads and look for visible debris. If the valve has a replaceable cartridge or screen, follow manufacturer guidance to inspect and clean it.
5. Re-measure and confirm
Measure pressure again on both sides. If downstream numbers have returned to normal and flow is steady, the repair is successful. If not, note whether the problem is isolated to one fixture or affects multiple outlets.
What Not to Do
- Do not assume pressure will self-correct without flushing and inspection.
- Do not overtighten fittings or force components; that can cause damage or leaks.
- Do not disconnect plumbing without shutting off the water and relieving pressure first.
- Do not keep working if you find active leaking into ceilings or walls — stop and address the leak or call a pro.
When to Call a Professional
- Multiple fixtures show low pressure after your checks and measurements.
- Upstream supply pressure is low (measured at a hose bib or pressure port).
- There’s visible damage, persistent leaks, or the valve appears defective after inspection.
- You don’t have the correct tools to safely measure or diagnose pressure problems.
Safety Notes
- Shut off water and open a downstream faucet to relieve pressure before disassembling fittings.
- Wear eye protection and gloves when flushing lines or removing debris.
- Be cautious with hot water — run cold first if you don’t know the water temperature after work.
- If your home has older piping (lead or brittle materials), consider calling a pro rather than forcing changes.
Common Homeowner Questions
- Why is the pressure worse after I tightened the new valve? — Tightening can push debris into the port or partially close the valve; isolate, flush, and recheck.
- Can trapped air cause low pressure? — Yes; trapped air often causes sputtering and feels like low pressure until flushed out.
- How long should flushing take? — Run the fixture for several minutes; if debris clears quickly you’ll see steady flow within 2–5 minutes, otherwise keep flushing while monitoring pressure.
Related Articles
If you’re troubleshooting a similar symptom, these guides may help:
For the full directory, see Pressure Loss After Plumbing Repairs.