Quick Answer:
If pressure dropped after a section was repiped, don’t assume it will fix itself. Start by measuring pressure at a convenient point, isolate the repaired section, flush the affected lines to clear air and debris, then measure pressure again on both sides of the repair. That sequence will show whether the repair introduced an obstruction, a partially closed valve, trapped air, or another issue.
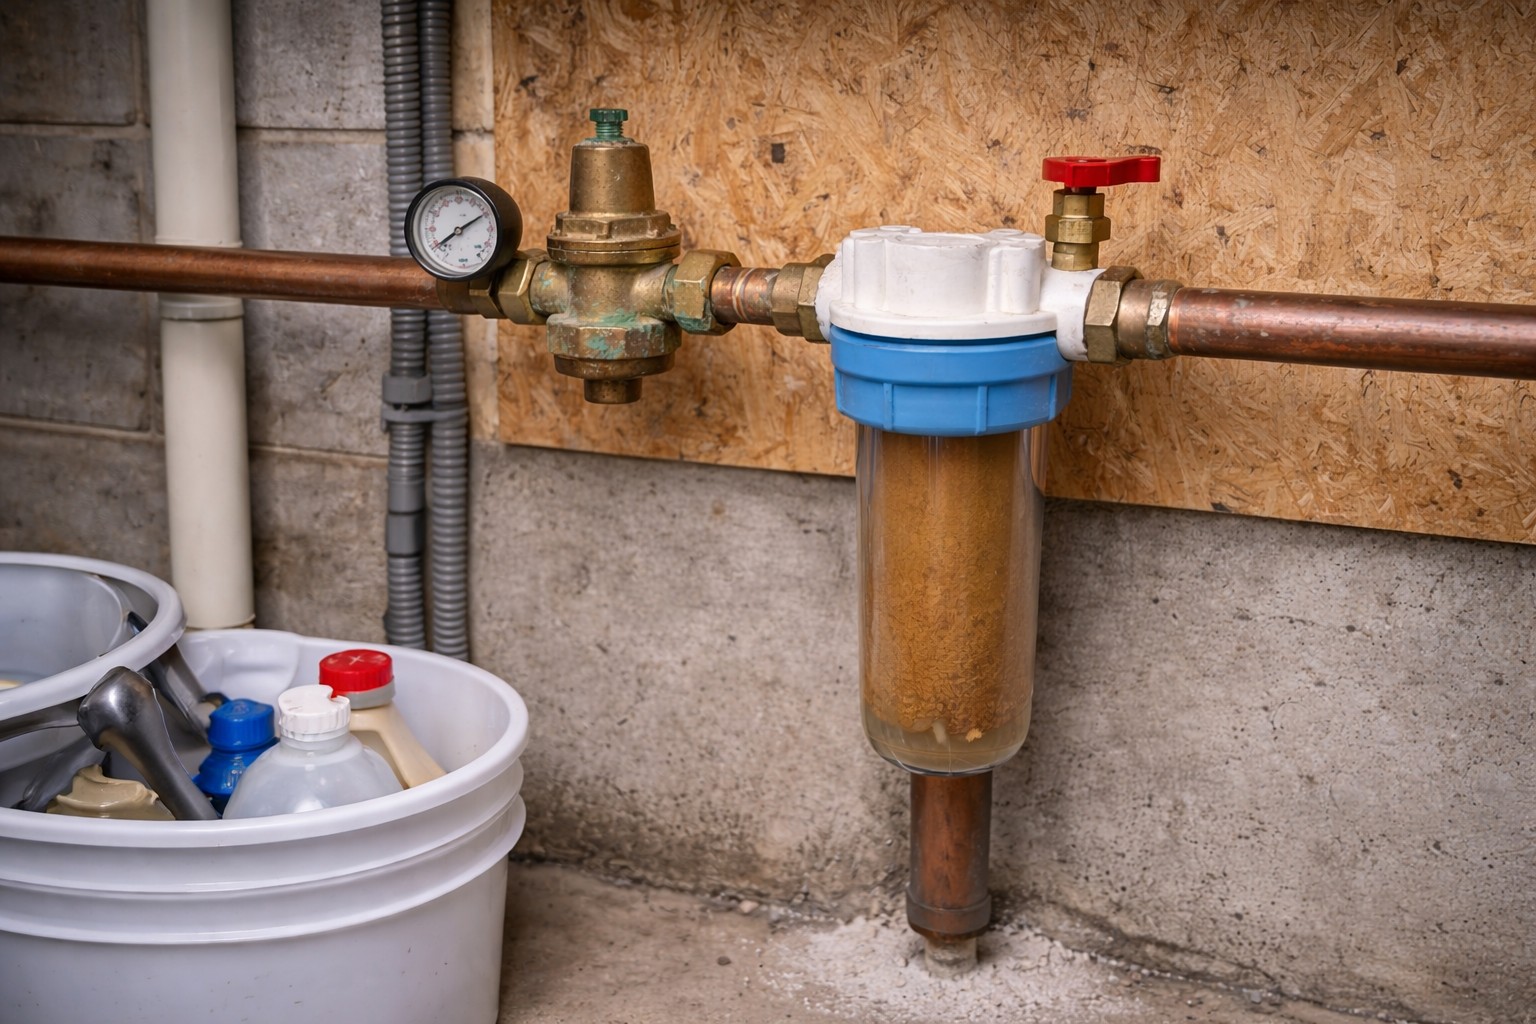
Why This Happens
- Partially closed valves or a valve not fully opened after work.
- Trapped air in the new piping causing sputtering and lower flow until flushed out.
- Debris (solder, flux, pipe shavings) left in the line after cutting and joining pipe.
- Incorrectly sized fittings or a constricted connection at the repair point.
- A kinked flexible connector or damaged section that reduces flow.
- Pressure regulator or shutoff devices affected during the job.
Step-by-Step What to Do
1. Prepare and have tools ready
- Gather a pressure gauge you can attach to a hose bib, adjustable wrench, towels, and a bucket.
- Know where the main shutoff and local shutoffs are for the repiped section.
2. Measure baseline pressure before the repair point
- Attach a pressure gauge to an outdoor hose bib or other accessible inlet upstream of the repair. Note the reading.
- If you have multiple zones, measure at the main supply and at a fixture serving the same branch so you have a before-and-after baseline.
3. Isolate the repaired component
- Close the local shutoff valves that isolate the repaired section while keeping the rest of the house connected, if possible.
- This lets you test pressure and flow on each side of the repair to confirm where the restriction is.
4. Flush affected lines
- With the repaired component isolated, open a downstream faucet and a higher upstream faucet to create a clear flow path. Run water for several minutes to purge air and debris.
- Remove aerators/screens from faucets before flushing to help dislodge and catch debris.
5. Measure pressure after the repair point
- Attach the gauge downstream of the repair and compare readings to the baseline upstream measurement.
- A significant drop downstream indicates a restriction, partially closed valve, or a damaged fitting at or near the repair.
6. Inspect and test fixtures
- Check for visible kinks in flexible hoses, tight or misaligned fittings, and any leaks at joints.
- Turn fixtures on one at a time to find where low pressure is experienced and whether flow improves after flushing.
7. Narrow down remaining problems
- If pressure is fine upstream but low downstream, re-check valves and fittings on that branch and consider removing and cleaning aerators and screens.
- If pressure is low both upstream and downstream, the issue may be at the main supply, regulator, or a larger system problem.
For related situations, consider reading Pressure problems after valve change and Pressure issues after smart shutoff install for troubleshooting when those components are involved.
What Not to Do
- Do not assume pressure will self-correct without flushing and inspection.
- Do not overtighten fittings or repeatedly strike pipes in the hope of improving flow — that can cause damage.
- Do not ignore signs of leaks, hammering, or discolored water after repiping; these need inspection right away.
- Do not remove or tamper with pressure relief valves or safety devices to try to raise pressure.
When to Call a Professional
- If flushing and isolating don’t locate or fix the problem.
- If you find a severe restriction, damaged pipe, or persistent leak at joints.
- If the main supply pressure is low or the pressure regulator may be failing.
- If you’re uncomfortable performing the isolation and pressure measurements safely.
Safety Notes
- Turn off water at the main before disconnecting plumbing. Depressurize the system by opening a faucet.
- Use eye protection and gloves when flushing lines that may contain debris or chemicals.
- Be cautious when working near electrical panels or appliances; water and electricity are dangerous together.
- If soldering or using open flame near work areas, follow proper fire safety and ventilation practices.
Common Homeowner Questions
- Q: How long should flushing take to clear air and debris?
A: Run water for several minutes per fixture; persistent air or discolored water after 5–10 minutes needs further inspection. - Q: Can a faucet aerator cause low pressure after repiping?
A: Yes — aerators can trap debris; remove and clean them during troubleshooting. - Q: Is it normal to lose a little pressure after changing pipe size or layout?
A: Minor changes can affect flow, but a noticeable loss usually points to a restriction, valve position, or trapped air that should be addressed.
Related Articles
If you’re troubleshooting a similar symptom, these guides may help:
For the full directory, see Pressure Loss After Plumbing Repairs.