Quick Answer:
If the sink started draining slowly right after work was done, don’t panic. Start with a quick inspection under the sink to check alignment and the trap for debris or loose fittings. Many slow drains after a repair are caused by a shifted or partially blocked P‑trap, a misaligned pop-up, or a loose connection that restricts flow.
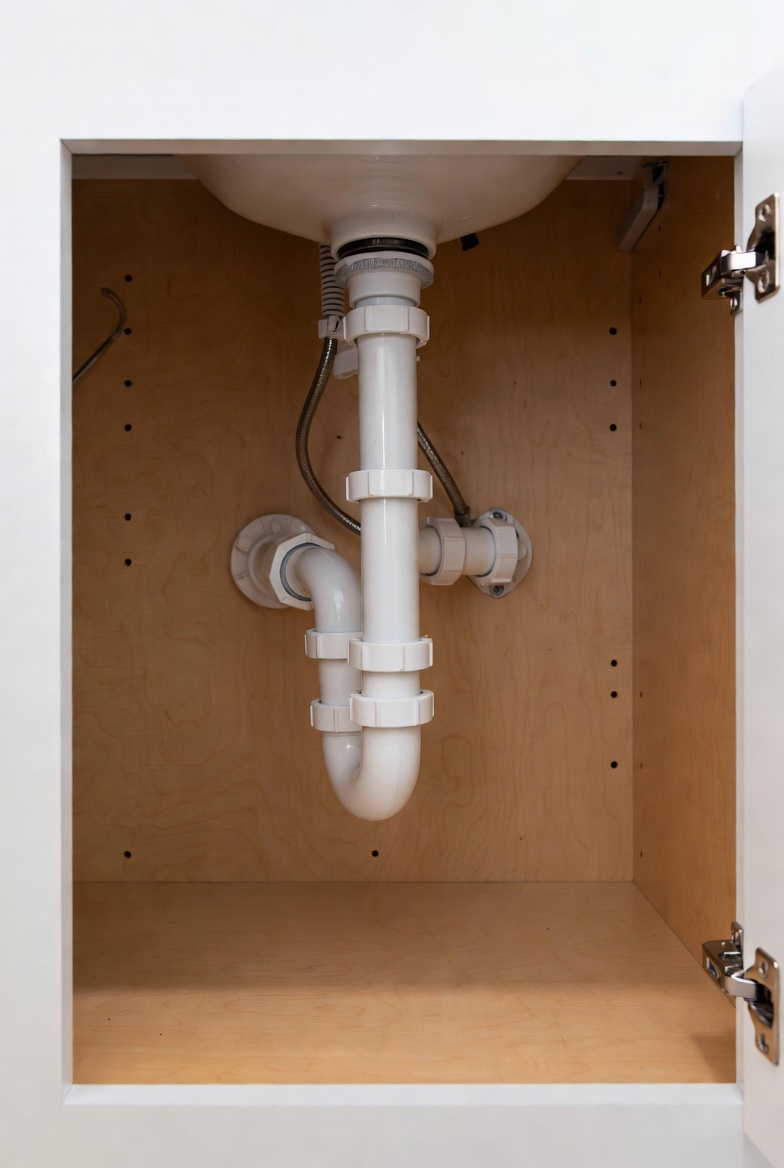
Why This Happens
- Parts moved during the repair — a pipe, P‑trap, or pop-up assembly can be slightly out of line, creating a partial restriction.
- Debris dislodged during the work — solder, plumber’s tape bits, putty, or hair can get nudged into the trap or drain line.
- New fittings or seals not seated correctly — a misaligned seal or compression fitting can narrow the flow path.
- Venting issues or an overlooked upstream clog — less common but possible if a repair disturbed venting or pushed a clog further down.
If the slow down seems tied to water temperature or shows no obvious clog, check specialized causes: Slow drain only when hot water used and Slow drain with no visible clog.
Step-by-Step What to Do
1. Quick operational test
- Run cold and warm water separately for 30–60 seconds and watch how the sink responds.
- Note whether the slowdown is immediate after the repair or developed after several uses.
2. Inspect under-sink alignment after repair
- Open the cabinet and look for misaligned pipes, tilted P‑trap, or gaps where fittings meet.
- Check that the pop-up linkage and drain basket sit straight and move freely—if they’re off, they can trap water.
- Tighten loose nuts by hand first, then tighten slightly with a wrench; avoid overtightening plastic parts.
3. Check and clean the P‑trap
- Place a bucket beneath the trap to catch water, then loosen the slip nuts and remove the trap.
- Inspect and remove visible debris, rinse the trap, and reassemble carefully, ensuring the washer seats properly.
4. Inspect the pop-up and sink strainer
- Remove the sink stopper or lift out the strainer basket and clear hair or gunk.
- Confirm the linkage isn’t pulling the stopper into a partially closed position.
5. Test above and beyond the trap
- If the trap is clear but the sink still drains slowly, run water while watching where flow slows—this helps decide if the restriction is past the trap.
- Try running water from a nearby fixture (like a bathtub) to see if venting or a shared drain is affected.
6. Reassemble and retest
- Put the trap and fittings back, hand‑tighten, then slightly more with a wrench. Run plenty of water to confirm improvement.
- If the problem is resolved, check again after a day of normal use to be sure nothing rebounds.
7. If you suspect a deeper clog
- Use a manual drain snake only if you’re comfortable; feed slowly and avoid forcing it. If you hit resistance you can’t clear, stop and call a pro.
What Not to Do
- Do not blame repair without checking trap — the P‑trap is the most common and easiest place to find the cause.
- Do not pour strong chemical drain cleaners down a drain that was recently worked on; they can damage seals and plastic fittings and create a safety hazard.
- Do not overtighten plastic nuts or fittings; that can crack parts and cause leaks.
- Do not force fittings or components if you’re unsure — stopping and calling a professional is safer than causing damage.
When to Call a Professional
- There’s a leak you can’t stop or a fitting that won’t tighten without damage.
- After basic checks and trap cleaning, the drain is still slow or drains only intermittently.
- There are smells, gurgling, or multiple fixtures backing up — signs of a deeper drain or vent problem.
- You’re uncomfortable removing or reassembling trap components or using a snake.
Safety Notes
- Turn off water supply only if you will be working on supply lines; for trap work you usually only need to shut off fixtures upstream if necessary.
- Wear gloves and eye protection when removing traps or debris. Have a bucket and rags ready for spills.
- Avoid mixing or using chemical drain cleaners, especially around fresh seals or plastic parts.
- If you smell strong chemicals or sewage, ventilate the area and leave the job to a professional.
Common Homeowner Questions
- Why did the sink only start draining slowly after the repair? Small shifts in alignment or loose debris knocked into the trap during the repair are the most common causes.
- Can I just use a chemical drain cleaner to fix it? No — avoid chemicals after a repair; try manual cleaning of the trap first or call a pro.
- How long should I try DIY fixes before calling a plumber? If basic trap inspection and tightening don’t clear it within an hour or you find leaks or damaged parts, call a professional.