Quick Answer:
Backups tied to an offset trap section are often caused by a small lip, step or abrupt angle where debris can collect. Check the offset fittings and the slip joints for any change in diameter or a ridge. A gentle realignment or replacement of the offset with a smooth, properly sized piece usually fixes the choke point; if you see standing water or slow draining that doesn’t clear with basic cleaning, get professional help.
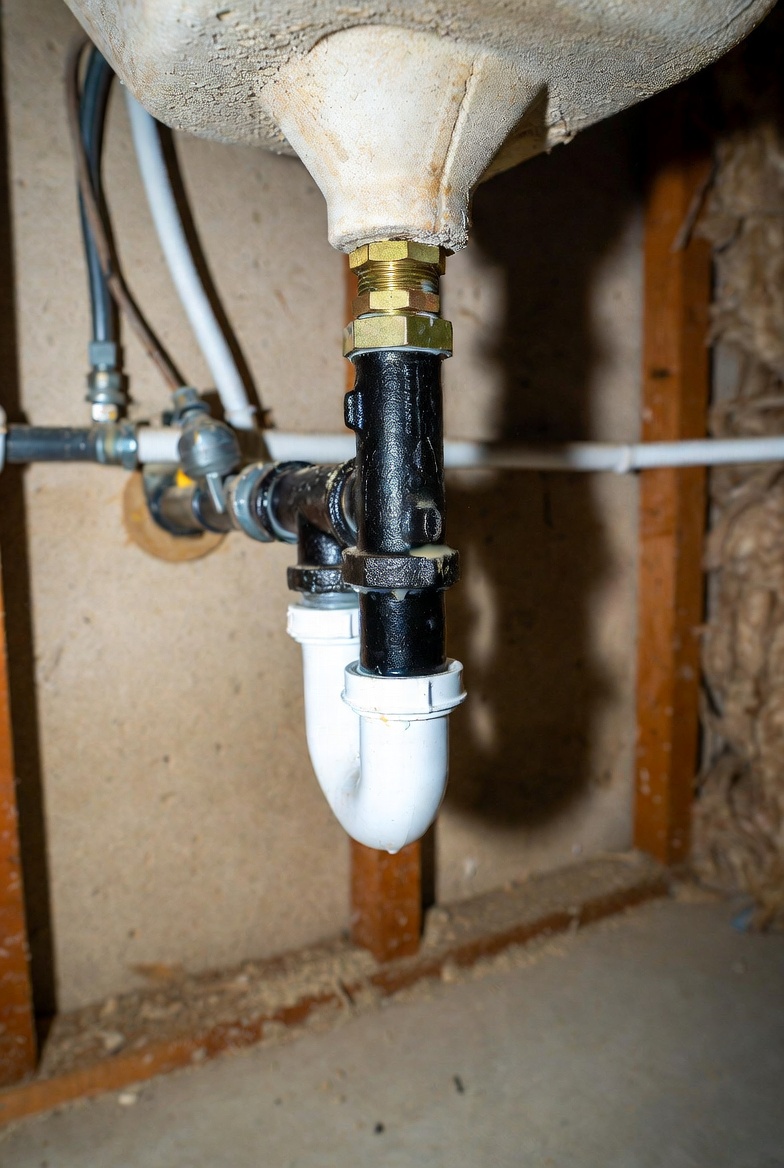
Why This Happens
When a trap has an offset—extra short pieces or angled adapters to move the trap horizontally—those connections can introduce a lip, a step or a sharp turn. Debris like hair, grease and grit catches at those discontinuities. Over time the trapped material builds and reduces flow until the line backs up. Common contributors include:
- Misaligned slip joints that leave an internal ridge.
- Adapters that change pipe diameter abruptly.
- Offsets added without maintaining smooth, downward slope.
A related issue to watch for is a Trap arm not level condition that causes water to pool and slow flow, and a trap design that effectively becomes a point where the Trap causes standing water.
Step-by-Step What to Do
Step 1 — Stop using the drain and clear visible debris
- Turn off water use to the fixture until you inspect the trap.
- Remove the stopper and scoop out any visible hair or gunk from the drain opening.
Step 2 — Inspect the trap and offset pieces
- Place a bucket under the trap to catch water.
- Loosen the slip nuts and remove the trap or the offset section where safe to do so.
- Look for a lip, step, or abrupt change in diameter inside the fittings that could catch debris.
Step 3 — Clean or replace the offending parts
- Clean the trap and any adapter parts with a brush and warm soapy water.
- If you find a rough internal ridge or a badly mismatched adapter, replace that piece with a smooth, properly sized section.
- Use straight trap sections or the minimal offset required, keeping joints smooth and sloped toward the drain.
Step 4 — Reassemble and test
- Reassemble slip joints hand-tight plus a quarter turn; avoid overtightening plastic nuts.
- Run water and watch for leaks and for the drain to clear normal flow.
- If slow draining continues, try a handheld auger through the trap arm before calling a pro.
What Not to Do
- Do not add unnecessary offsets that create steps where debris catches.
- Do not force-fit mismatched diameters; that creates internal ridges and future clogs.
- Do not use strong chemical drain cleaners in a trap you plan to remove—those chemicals can splash and cause injury or damage to pipes.
When to Call a Professional
Call a plumber if:
- You find corrosion, cracked fittings or repeated backups after cleaning.
- The drain continues to back up beyond the trap arm, which may indicate a deeper clog in the main line.
- There’s a sewer odor, bubbling toilets elsewhere in the house, or multiple drains backing up at once.
Safety Notes
- Wear gloves and eye protection when opening traps—waste water and debris can be unpleasant and unsanitary.
- Avoid inhaling fumes from chemical cleaners. Prefer manual cleaning or a mechanical auger for backups in trap offsets.
- If you are unsure about how components fit together, stop and call a professional; incorrect reassembly can cause leaks or sewer gas entry.
Common Homeowner Questions
- Why does the drain keep getting slow after I clean it? If an offset has a ridge or poor alignment, debris will re-collect; replacing the offending fitting fixes recurring slow drains.
- Can I just snake past the trap to clear it? You can use a short hand auger for the trap and trap arm, but snaking beyond the trap without removing it can push debris further into the line.
- Will replacing the trap fix all backups? Only if the trap or offset is the cause; backups from the main sewer or venting issues need a professional inspection.
For more related articles, see the P-Trap Geometry & Improper Slope Issues hub.