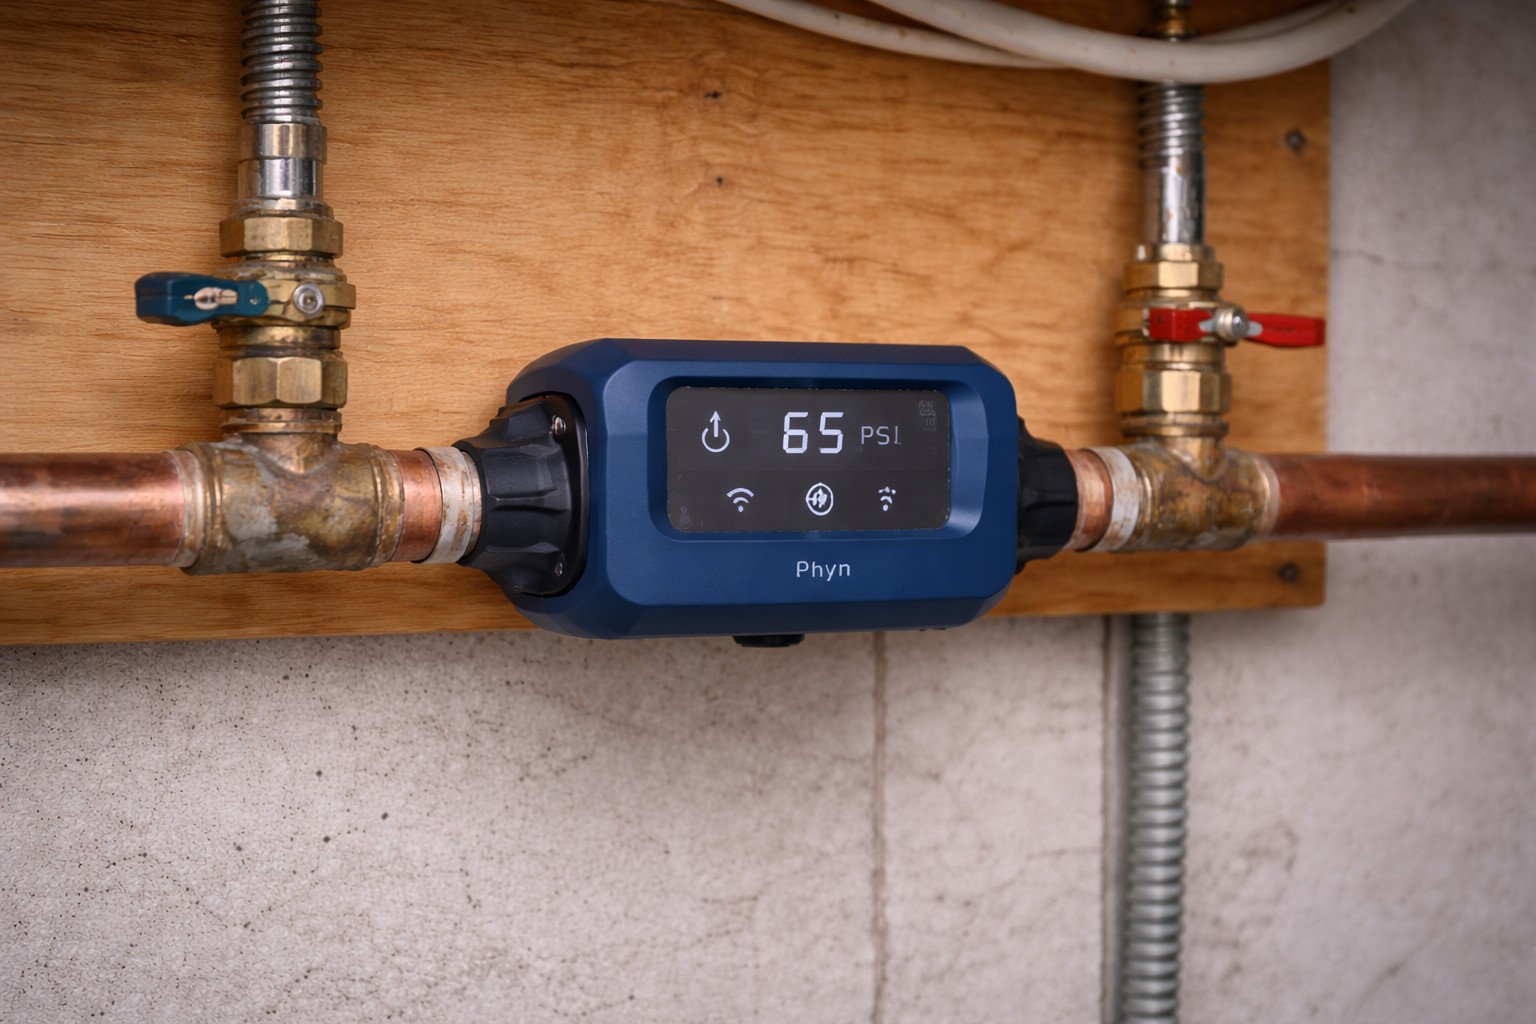
Bottom Line Up Front Low, fluctuating, or unstable pressure after installing a smart shutoff valve is almost always from trapped air, debris during install, a partially closed or misaligned valve, or the device restricting flow. Isolate the shutoff, flush lines thoroughly, and measure pressure upstream vs. downstream. These steps identify most post-install issues quickly. If pressure stays low or the device leaks, contact the manufacturer or a licensed plumber.
Common Causes Smart shutoff valves sit directly in the main water line, so any installation hiccup can affect the whole house. The most frequent reasons include:
- Trapped air pockets introduced when the line was opened/refilled — air compresses and reduces flow until purged.
- Debris (sediment, scale, or install material) lodged in or around the new valve, restricting flow.
- Valve not fully open, installed backward, or with a faulty internal seal/cartridge.
- Pressure drop across the device itself (some models have built-in restrictions or require calibration).
- Related plumbing disturbances — similar to issues after other repairs like Pressure low after DIY plumbing or Pressure loss after new shower valve.
If pressure is normal before the shutoff but drops after, the device or immediate plumbing is the culprit. If low everywhere, check upstream (utility/meter).
Tools & Materials You’ll Need
- Water pressure gauge (screw-on for hose bib, with max/min needle ideal)
- Bucket/towels (for drips during checks)
- Adjustable wrench (for gauge or valve access)
- Flashlight (to inspect valve area)
- Safety gloves and glasses
Step-by-Step Troubleshooting & Fixes
Step 1: Isolate the Smart Shutoff
- Follow manufacturer instructions to close the smart shutoff (app or manual override).
- Open a downstream faucet to confirm no flow — verifies isolation.
- If no local isolation valves exist, shut the house main temporarily.
Step 2: Flush Affected Lines Thoroughly
- With shutoff closed, open downstream faucets (start low, work high) to purge air/debris.
- Run cold water full blast 5–10 minutes — repeat on hot if needed.
- Reopen smart shutoff and test flow — air/debris often clears with flushing.
Step 3: Measure Pressure Upstream vs. Downstream
- Attach gauge to hose bib or test port upstream of shutoff → record static pressure (normal 50–70 psi).
- Move gauge downstream (after shutoff) → compare readings.
- Large drop (>5–10 psi) → restriction at valve.
- Fluctuations during flow → air, debris, or device issue.
Step 4: Inspect Valve & Immediate Plumbing
- Visually check for leaks, loose fittings, or obvious misalignment.
- Confirm valve is fully open (app/manual check).
- If accessible, inspect cartridge/screen for debris (power off smart features first).
Step 5: Decide Next Steps
- Pressure normal after flush → Monitor; resume use.
- Drop persists → Contact manufacturer support or plumber for valve inspection/replacement.
Mistakes to Avoid
- Don’t force valve open/closed — can damage internal parts.
- Don’t assume air will clear without flushing — persistent pockets cause ongoing issues.
- Don’t tamper with utility meter/PRV without guidance — can cause leaks or void service.
When to Call a Professional
- Pressure drop across shutoff persists after flushing/measurement.
- Valve leaks, won’t fully open/close, or shows error codes.
- Frequent fluctuations or you’re uncomfortable isolating/testing safely.
- Suspect debris or misalignment from install.
Safety First
- Shut off water and relieve pressure before inspections to avoid spray.
- Wear gloves/eye protection when working near valves.
- Avoid electrical contact with smart shutoff components while plumbing is wet.
- General DIY guidance — plumbing varies; consult pro when in doubt.
Readers Also Ask Why did pressure drop right after install? Air, debris, or partial closure during fitting are most common immediate causes.
How long should flushing take? 5–10 minutes per low/high point; longer if air/debris heavy.
Is this a health risk? Usually not — aesthetic/pressure issue; test if taste/smell accompanies.
Related Articles If you’re troubleshooting similar symptoms, these guides may help:
- Pressure low after DIY plumbing
- Pressure loss after new shower valve
For more related articles, see the Pressure Loss After Plumbing Repairs hub.
Disclaimer: This content is for informational purposes only and not a substitute for professional plumbing advice. Attempting repairs can cause damage or injury—proceed at your own risk and call a licensed plumber when in doubt.