Quick Answer:
Your sink stopper stopped responding because the lift or pivot mechanism under the sink has broken or come apart. Look under the sink: the lift rod and pivot rod may be snapped, bent, or missing the small clevis clip that holds them together. In many cases you can reattach or replace the clip or rod yourself; if parts are badly corroded or the drain body is damaged, call a plumber.
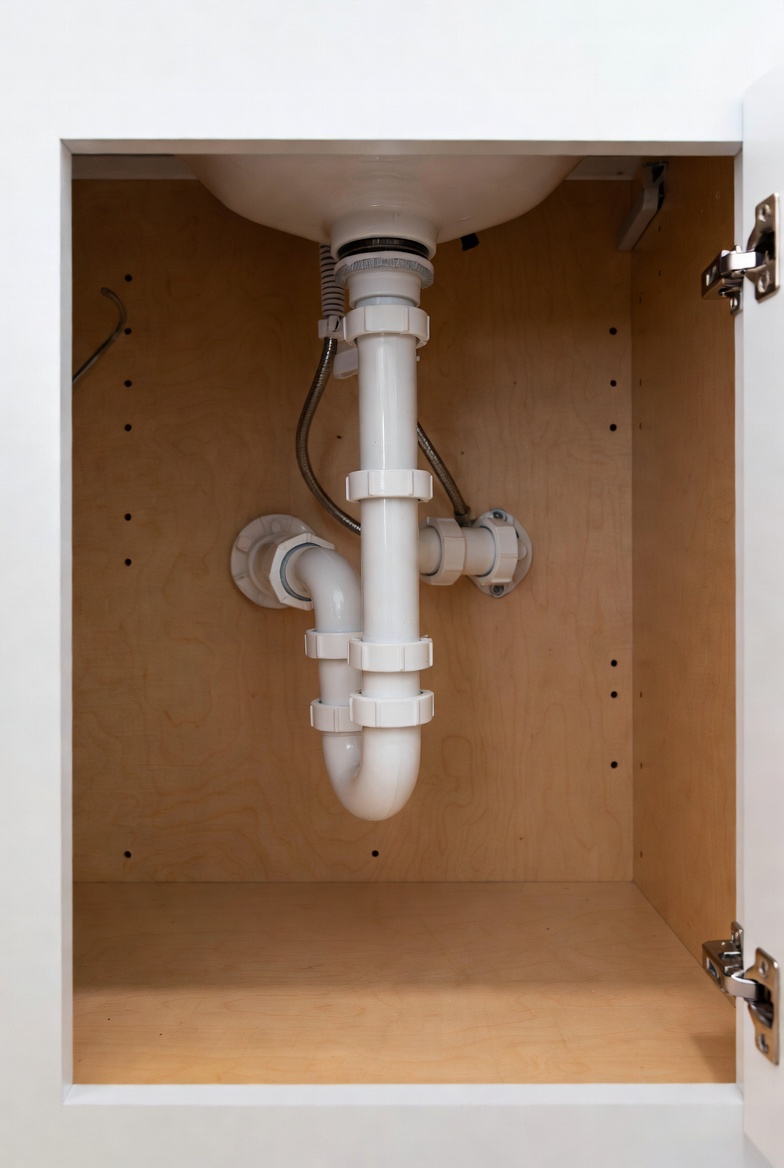
Why This Happens
- Wear and tear: Metal fatigue, corrosion or repeated stress can snap the pivot or lift rod over time.
- Loose hardware: The clevis clip or the small retaining nut can work loose and let parts fall away.
- Improper force: Pulling the lift rod hard or forcing the stopper from above can bend or break the rods or the pivot seat.
- Debris and buildup: Hair and gunk can jam the mechanism so people apply extra force, which can break thin parts.
Step-by-Step What to Do
1. Prepare and clear the area
Put a bucket or towel under the sink to catch small parts and any drips. Turn off water only if you will be taking apart fittings near supply lines; turning water off is not usually required for the stopper mechanism itself.
2. Inspect the linkage
Open the cabinet and look up at the tailpiece and horizontal pivot rod. Inspect the lift rod and pivot rod for a clean break or missing clevis clip. Note whether the pivot rod is still engaged with the stopper post and whether the clevis clip (a small U-shaped clip) is present and seated.
3. Remove the stopper to see the fit
- Lift the stopper from the sink or unscrew the pivot nut and slide the pivot rod out to free the stopper. Many stoppers lift straight out once the pivot rod is disengaged.
- Check the stopper post and pivot seat for cracks or wear where the pivot rod rests.
4. Reattach or replace the small parts
- If the clevis clip is missing or the clevis pin is loose, replace that clip. These are inexpensive and often available at hardware stores.
- If a rod is bent or snapped, remove the damaged rod and install a replacement pivot rod or lift rod. Match the length and diameter as closely as possible.
- When reinstalling, make sure the pivot rod enters the stopper post and the clevis clip secures the connection; tighten the retaining nut so the rod holds but still allows smooth movement.
5. Test the mechanism
Operate the lift rod to raise and lower the stopper while watching the pivot rod engage. If the stopper moves but does not seal or the motion is loose, further adjustment or part replacement may be needed. If the stopper spins or isn’t seating properly, check related issues like a worn seat or hair obstruction — for example, see Stopper spins freely and Stopper clogged with hair.
6. Replace the stopper or drain body if necessary
If the stopper post, pivot seat, or drain body is cracked or excessively corroded, replace the assembly. Replacing the entire drain and stopper is a more involved job and may be better handled by a professional if you are not comfortable with plumbing seals and plumber’s putty.
What Not to Do
- Do not keep using a broken rod—sharp edges can damage the drain body.
- Do not force the lift rod or pry repeatedly at a stuck stopper; that can break more parts.
- Avoid using glue on metal parts under the sink; it prevents proper adjustment and future repair.
When to Call a Professional
- The drain body or stopper post is cracked or stripped.
- Corrosion has fused components together or you can’t access the broken parts without removing the drain.
- You’ve replaced clips and rods but the stopper still won’t seal or the mechanism binds.
- There are leaks after reassembly that you cannot locate or stop.
Safety Notes
- Wear gloves when handling broken metal to avoid cuts from sharp edges.
- Use proper eye protection if you are loosening corroded nuts or hammering gently to free stuck parts.
- Keep small parts like clips and nuts in a container so they don’t fall into the drain or disposal.
Common Homeowner Questions
- My stopper is stuck closed—can I fix it myself? Yes, often by removing the pivot rod and cleaning or reattaching the stopper; if the seat is broken, a replacement may be needed.
- Can I replace the clevis clip without removing the drain? Usually yes; the clip sits on the clevis and can be replaced with the pivot rod accessible from under the sink.
- How long does a replacement take? A simple clip or rod swap takes 10–30 minutes; replacing the drain can take 30–90 minutes depending on seal and access.