Quick Answer:
If you installed a new faucet and notice water coming out near the overflow, a drain or pop-up assembly was likely disturbed or a connection under the sink is dripping into the overflow channel. Start by watching the sink while you run water, then inspect around the faucet base and under-sink connections to see if anything is dripping into the overflow area. Many causes are simple fixes: re-seat the pop-up, tighten a tailpiece by hand, or clear a blocked overflow channel.
Why This Happens
A sink overflow is a pathway inside the bowl that prevents spills by directing excess water into the drain. During a faucet install you may have shifted or loosened the drain flange, pop-up linkages, or tailpiece so water runs into the overflow instead of the drain. Debris can also trap water in the overflow channel, which then finds a path out where the sink meets the cabinet. If the overflow channel itself fills or is blocked, it can push water back toward seams and cause visible leaking — for example, an Overflow channel clogged with gunk will make small leaks appear worse.
Step-by-Step What to Do
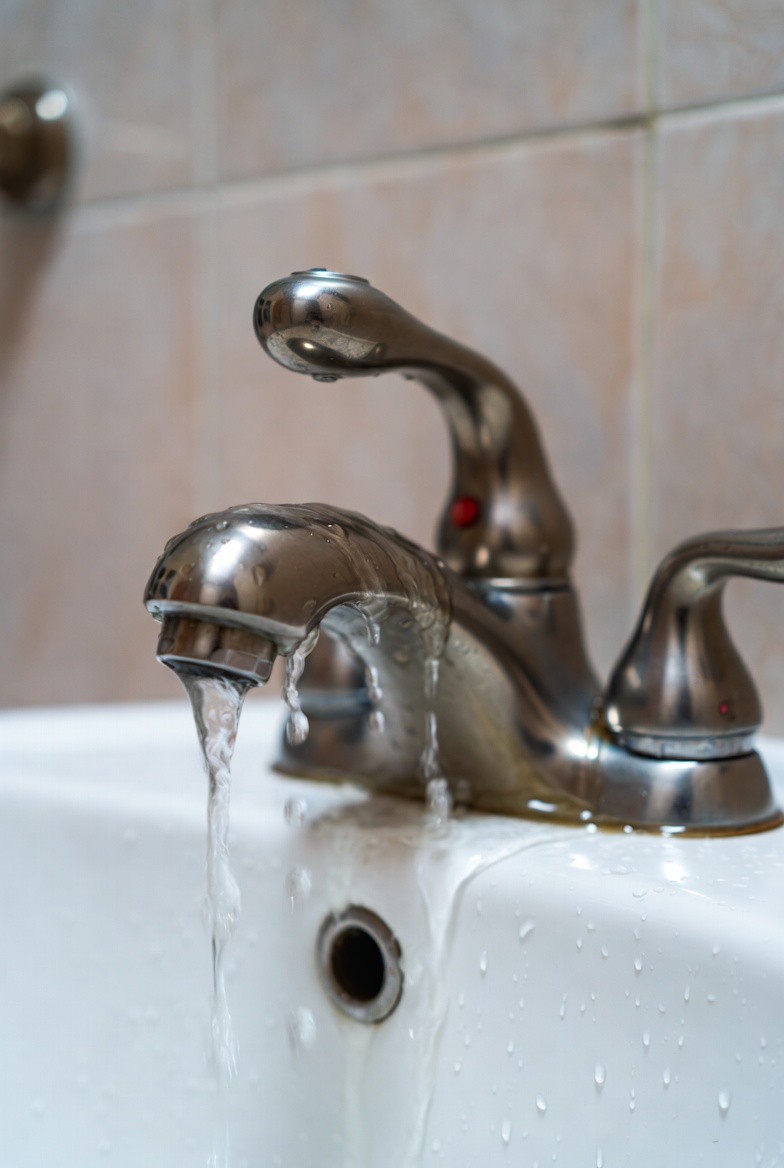
1. Observe the leak in real time
- Run the faucet and watch where the water goes. Fill the basin partway and see whether the overflow begins leaking or where drips show up under the sink.
- Have a towel or bucket ready under the drain to catch any drops so you can see the exact source.
2. Inspect the faucet base and under-sink connections
- Look around the faucet base for water tracking inward toward the overflow opening — a poorly seated escutcheon or seal can direct water into the overflow.
- Under the sink, check the drain flange, tailpiece nut, and slip joints. If any connection is loose, water can drip into the cabinet and follow seams back into the overflow area. Gently feel for moisture with a dry paper towel.
3. Check the pop-up and overflow tube
- Remove the sink stopper and inspect the pop-up assembly. Make sure the pivot rod and nut are tightened enough to align but not overdriven.
- Use a flashlight to view the overflow channel from the stopper opening. If you recently worked on the drain, also consider whether the repair disturbed the pathway — see Overflow problem after repair.
4. Make small adjustments and test
- Tighten loose slip-nuts by hand and give them a quarter turn with a wrench only if needed. Re-seat the pop-up stopper and test several times.
- If you find a leaking gasket or cracked tailpiece, replace that part and retest rather than trying to force a permanent seal with excessive tightening.
5. Clear blockages if present
- Clean the overflow channel and drain opening with a small brush or flexible cleaning tool. Remove visible gunk and flush with water.
- After cleaning, run water and verify the overflow is no longer allowing pooled water to leak out.
What Not to Do
- Do not overtighten faucet hardware trying to ‘fix’ an overflow leak—check the drain/overflow tube first.
- Do not use superglue, silicone applied in random spots, or pipe dope on parts that should be removable; these make future repairs harder.
- Do not pour harsh chemical drain cleaners down the overflow; they can damage finishes and the overflow channel and are poor at removing the type of gunk that sits in the overflow.
When to Call a Professional
- The leak continues after you’ve checked and tightened accessible fittings.
- Water is pooled in the cabinet or soaking through cabinet bottoms or floors — signs of ongoing damage or hidden leaks.
- Parts are corroded or cracked and you aren’t comfortable replacing them yourself, or the layout is hard to access.
Safety Notes
- Turn off the water supply valves before disconnecting drain fittings to avoid unexpected flow.
- Place a bucket and towels under the work area to catch spills and protect cabinets.
- Watch for sharp metal edges on sink openings and drain parts; wear gloves if you have them.
- Avoid mixing chemical cleaners; use mechanical cleaning (brushes or picks) for overflow gunk instead of strong chemicals.
Common Homeowner Questions
- Why did the leak start right after installation? Small movements or loosened connections during the install commonly shift the pop-up or tailpiece so water finds the overflow path.
- Can I ignore a slow overflow leak? No. Even slow leaks can cause cabinet damage and mold over time; fix or contain it promptly.
- Is replacing the pop-up assembly hard? Usually not — most are accessible from under the sink and swap out with basic tools, but tight spaces can be tricky.