Quick Answer:
A P-trap that hangs unusually deep can act like a small bucket, collecting hair and paste-like buildup and slowing drainage. Measure how far the trap hangs below the sink and inspect the bottom of the trap for accumulated paste-like debris. If the trap contains a thick layer of gunk you can usually clean it out; if the trap’s shape or position is the problem, a plumber may need to reconfigure the drain.
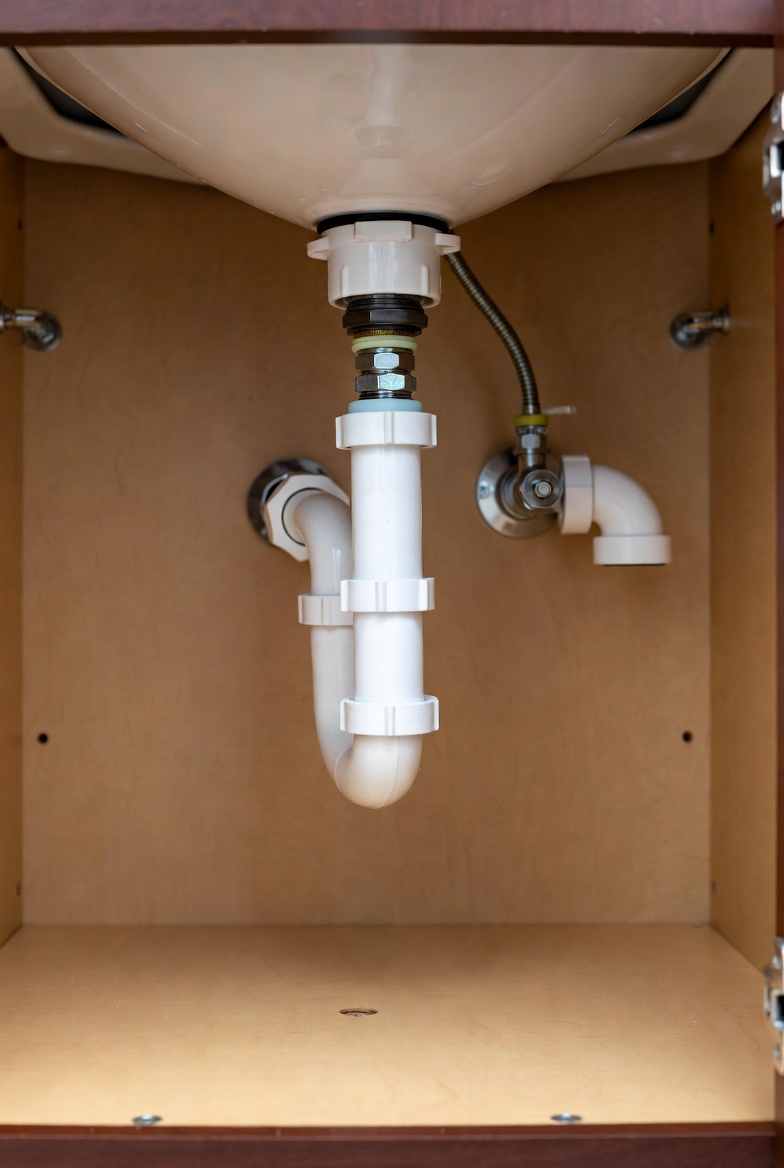
Why This Happens
The P-trap is meant to hold a small amount of water to block sewer gases while letting waste flow through. When the trap’s bend sits much lower than normal it creates a low spot where hair, soap scum, grease and toothpaste solids can settle. Over time that material becomes sticky and paste-like and builds up at the trap’s lowest point.
A trap that is unusually deep can also change how the drain behaves. It can encourage slow accumulation, and it may make related issues more noticeable — for example, problems with a vent or trap siphoning. If the trap arm isn’t aligned properly, the trap may sag or sit too low, which worsens buildup and slows flow.
Watch for these signs: water drains slowly, there’s a recurring soft clog, or you see paste-like residue when you remove the trap.
Step-by-Step What to Do
1. Prepare and protect the area
- Place a bucket under the trap to catch water and debris.
- Put on disposable gloves and eye protection if available.
- Have a pair of channel-lock pliers or adjustable pliers and a rag ready.
2. Measure how deep the trap hangs
- Use a tape measure or ruler to measure from the sink tailpiece outlet (where the pipe leaves the sink) down to the lowest point of the trap. Note the vertical distance in inches or centimeters.
- Compare the measurement to the typical clearance under your sink: if the lowest point is several inches lower than nearby installations or the trap arm slopes steeply, the trap is likely too deep.
3. Inspect the bottom for accumulated paste-like debris
- Loosen the slip nuts on both ends of the P-trap. Turn them by hand first, then use pliers only if needed. Keep the bucket underneath.
- Remove the trap and look at the inside bottom. Use a disposable scraper or an old toothbrush to clear out hair, soap scum and paste-like buildup.
- Rinse the trap with warm water and wipe dry. If the inside surface has stubborn residue, repeat scraping and rinsing until the trap is clear.
4. Reassemble and test
- Reinstall the trap with its washers seated correctly; hand-tighten the slip nuts, then give a small additional turn with pliers. Do not overtighten.
- Run water and watch for leaks. Check drainage speed and listen for gurgling that could indicate a vent or slope issue.
5. If buildup returns or trap is still too low
- If the trap fills again quickly, or you measured a pronounced drop and suspect poor slope or venting, the drain layout may need adjustment.
- Document your measurements and what you cleaned before contacting a professional.
What Not to Do
- Do not install an extra-deep trap as a workaround; it can increase buildup and slow drainage.
- Do not rely on strong chemical drain cleaners to remove thick, paste-like deposits. They are often ineffective against solids and can damage pipes or finishes.
- Do not force fittings or cut pipes unless you know the plumbing layout; improper cuts or joints can lead to leaks or sewer gas entry.
When to Call a Professional
- If the trap is structurally deep due to the drain layout and needs re-piping to correct slope or height.
- If you find persistent clogs after cleaning, or the trap arm appears compromised or badly misaligned.
- If you see leaks you cannot stop, steady gurgling, or sewer odors after cleaning the trap.
When you call, tell the plumber the measured trap depth and that you inspected the trap bottom for paste-like debris — this helps them diagnose whether the issue is the trap shape, venting, or trap arm alignment.
Safety Notes
- Always use a bucket under the trap to catch spills and protect cabinet interiors.
- Wear gloves and eye protection when handling old drain debris.
- Avoid mixing chemical cleaners with physical cleaning; residues can splash or react unpredictably.
- Turn off nearby water supplies if you are unsure how to stop the flow, and stop work if you encounter damaged or corroded pipe that looks unsafe to handle.
Common Homeowner Questions
- How often should I clean the P-trap?
Clean it when you notice slow drainage or smells; many households benefit from checking every 6–12 months. - Will a deeper trap always clog more?
Not always, but a trap that sits lower than the drain line or has poor slope makes buildup more likely. - Can I adjust the trap height myself?
If the trap simply needs re-positioning and the fittings allow it, yes; if re-piping or vent changes are needed, hire a plumber.
For related issues check Trap siphoning dry and Trap arm not level for guidance on how those problems can affect traps and drainage.