Quick Answer:
If you see overflow coming out after a recent repair, it usually means a blockage, misalignment, or a loose connection was disturbed. Check the overflow path and drain fittings before assuming a major failure.
Why This Happens
During a repair, parts under the sink or inside the drain can get shifted, debris dislodged, or seals disturbed. An overflow path is a small channel and can be easily blocked by putty, plumber’s tape, or bits of plumber’s work. Air or water flow changes can also reveal an existing issue that wasn’t obvious before the repair.
If the stopper or tailpiece was removed and reinstalled, the overflow and drain alignment can be off, which leads to slow drainage or water coming back through the overflow. Check for signs of misalignment or an improperly seated tailpiece. If you recently had work done and now find the sink acting differently, see Sink stops draining after plumbing visit and Sink drain alignment issues after repair for steps specific to those problems.
Step-by-Step What to Do
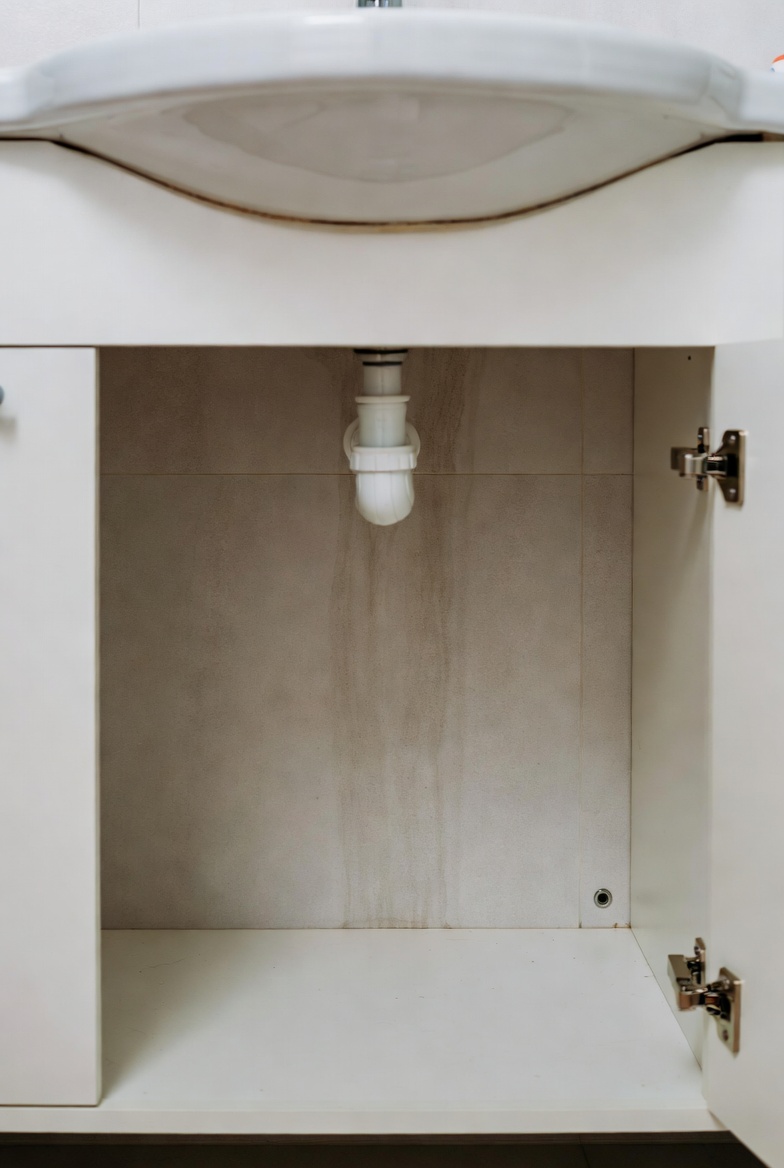
1. Visual check
- Look under the sink for loose or disconnected fittings, especially the tailpiece and trap.
- Open cabinet doors and feel for water drips or wet areas that indicate a leak or overflow path.
2. Confirm overflow flow
- Pour water into the overflow to confirm free flow. This shows whether the overflow channel itself is clear and where the water is traveling.
- Watch under the sink while you pour to see if water appears where it shouldn’t.
3. Check the stopper and tailpiece
- Remove and reinstall the stopper to ensure it’s seated correctly and not blocking the overflow channel.
- Verify the tailpiece is straight and aligned with the trap; a bent or miscut tailpiece can redirect water.
4. Inspect the trap and drain for clogs
- Place a bucket under the trap, loosen the slip nuts, and check for blockages or debris.
- Clear any visible clogs and reconnect the trap securely.
5. Test the drain and faucet
- Run the faucet at normal and full flow while watching the overflow and under-sink area for leaks or backing up.
- If the sink fills before draining, there’s still an obstruction or venting issue.
6. Re-check connections and seals
- Tighten slip nuts hand-tight plus a small turn with a wrench; avoid over-tightening.
- Look for misapplied sealants or tape that might have been pushed into openings during the repair.
7. If small fixes fail, isolate the problem
- Disconnect the tailpiece and run water to see if the issue is above or below that point.
- Note any persistent overflow pattern to report if you call a pro.
What Not to Do
- Do not seal the overflow opening permanently. That opening exists to prevent spills and must remain functional.
- Don’t use excessive force on plastic fittings or overtighten metal connections — that risks cracking the parts.
- Avoid pouring harsh chemical drain cleaners into a recently disturbed system; they can damage seals and are unsafe if leaks are present.
When to Call a Professional
- There is active leaking that you cannot stop or locate.
- The sink overflows repeatedly despite clearing visible blockages and checking alignment.
- Smells of sewer gas, gurgling noises, or multiple drains in the house are affected — these suggest venting or main-line issues.
Safety Notes
- Turn off water at the shutoff valves before working under the sink to avoid unexpected sprays.
- Wear gloves and eye protection when handling dirty traps or when using tools under the sink.
- If you see electrical wiring near the leak, cut power to that area before touching anything and call a pro if unsure.
Common Homeowner Questions
- Why did this start right after the repair? Small shifts, removed seals, or dislodged debris during the repair often reveal or create overflow symptoms.
- Can I fix it myself? Many times yes — clear blockages, realign the tailpiece, and reseat the stopper; call a pro if leaks persist.
- Will sealing the overflow stop the problem? No — sealing it can cause bigger spills and is not a safe long-term solution.