Quick Answer:
If the lift rod moves but the stopper doesn’t, a common cause is the pop-up linkage under the sink coming loose. Look under the sink for the pivot rod clip or nut that came loose. In many cases you can reattach or tighten the clip where the pivot rod meets the drain tailpiece and restore normal operation within a few minutes.
Why This Happens
- Wear and vibration: Over time the pivot rod clip or retaining nut can work loose from normal use or vibration.
- Loose or missing fastener: The small C-clip or nut that holds the pivot rod in place is easy to dislodge during cleaning or repairs.
- Damage to parts: Corrosion, stripped threads, or a bent rod can prevent the linkage from engaging. In some cases you may see issues like Stopper leaks water constantly because worn or bent parts no longer seal properly.
Step-by-Step What to Do
Step 1 — Prepare the area
- Put a small bucket or bowl under the drain to catch drips and any small parts.
- Clear under-sink items so you can reach the tailpiece and pivot rod easily.
- Turn off the faucet and avoid running water while you work.
Step 2 — Inspect the linkage
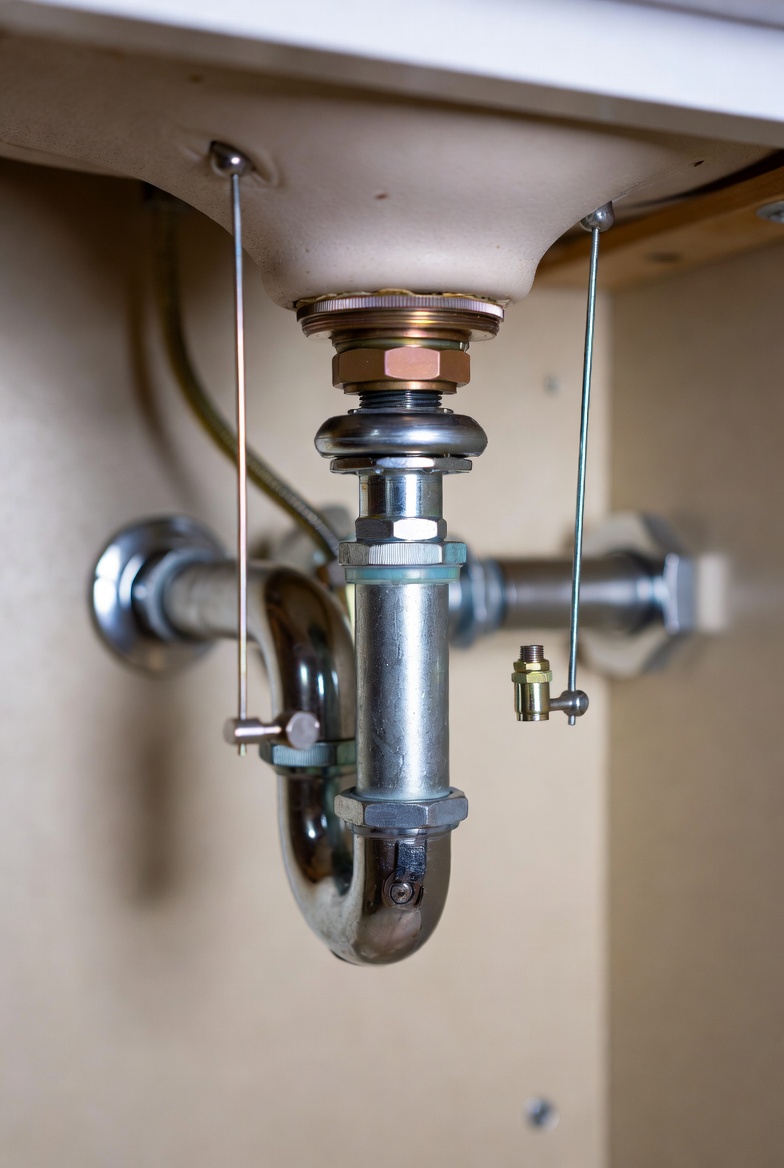
- Look under the sink for the pivot rod clip or nut that came loose. Identify the pivot rod (a horizontal rod that goes into the drain tailpiece) and check whether a C-clip is missing or a nut is loose.
- Note whether the pivot rod is bent, corroded, or broken. If it looks bent from a previous repair, you may have a Linkage bent after repair situation and should handle it gently.
Step 3 — Reattach or tighten the pivot rod
- If the C-clip is off but present, slide the pivot rod back into the tailpiece and snap the clip into its groove.
- If a nut is used, hand-thread it and snug it with pliers—don’t over-tighten; it only needs to hold the rod in the tailpiece without binding movement.
- Support the stopper from above with one hand while you reconnect the pivot rod so the stopper seats correctly.
Step 4 — Test movement and seal
- Operate the lift rod to verify the stopper raises and lowers smoothly.
- Run a small amount of water to check for leaks around the tailpiece or pivot rod connection.
Step 5 — Replace missing or damaged parts if needed
- If the C-clip, nut, or pivot rod is missing, corroded, or bent, replace the part rather than forcing a repair.
- Keep replacement parts on hand or buy a pop-up assembly kit if several components are worn.
What Not to Do
- Do not run the sink with a disconnected linkage if parts can fall into the trap.
- Do not force a bent rod back into place; forcing can break the rod or damage the tailpiece threads.
- Avoid over-tightening the retaining nut—this can strip threads or prevent the stopper from moving freely.
When to Call a Professional
- If the pivot rod or tailpiece is cracked, heavily corroded, or the threads are stripped.
- If parts have fallen into the trap and you can’t retrieve them without disassembling plumbing, or if leaks develop at the trap or drain connections.
- If the linkage is hard to access (tight cabinet space, complex faucet assembly) or you’re uncomfortable working with plumbing.
Safety Notes
- Wear gloves to protect your hands from sharp metal and cleaning residue.
- Place a container under the drain to catch any falling parts or water.
- Avoid using excessive force; use the right-sized pliers and hand tools to prevent damage and injury.
Common Homeowner Questions
- Why did the clip come off? The clip can work loose over time from normal use, cleaning, or if it wasn’t fully seated.
- Can I replace the clip myself? Yes—most C-clips and pivot rods are inexpensive and straightforward to replace.
- Will fixing this stop all leaks? Fixing the linkage restores stopper operation; if you have continuing leaks, the drain seal or stopper may need attention.