Quick Answer:
Hair collects only in the P-trap because that is the first low point in the drain where flow slows and debris settles. The trap’s shape, a nearby stopper or strainer, and soap scum can all cause hair to snag and build up there while the rest of the drain stays clear. Cleaning the trap and checking its shape will often stop the problem.
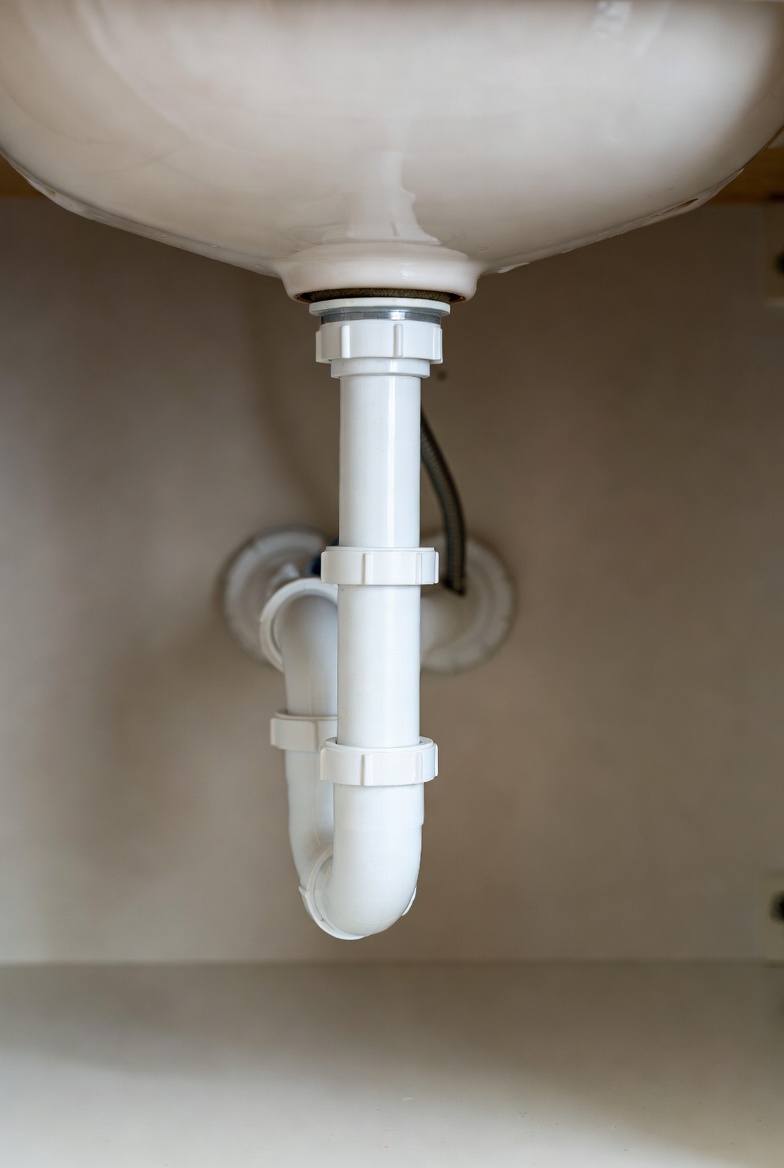
Why This Happens
Several simple reasons explain why hair piles up only in the P-trap:
- The trap is a deliberate low spot where water pauses; anything that floats or gets carried along can drop out there.
- A deep pocket, an oddly bent trap, or poorly aligned trap sections create an extra place for hair to collect.
- Stoppers, strainers, or rough pipe interiors will catch hair before it moves past the trap.
- Soap scum and oily residues make hair stick together instead of flowing away.
If you recently changed sink hardware, check for installation causes — for example, a new stopper can concentrate hair at the trap. See Hair buildup after installing pop-up stopper for more on that scenario.
Step-by-Step What to Do
1. Prepare and protect the area
- Put a bucket under the trap to catch water and debris.
- Wear disposable gloves and eye protection if the trap looks dirty.
- Have a rag and a small brush or old toothbrush ready.
2. Remove and inspect the trap
- Loosen the slip nuts on each side of the trap by hand or with pliers (turn counterclockwise).
- Lower the trap into the bucket and tip out its contents onto the rag so you can see what’s collecting.
- Compare trap shape to ensure no deep pocket exists. A U-shaped trap should be smooth; look for extra bends or a widened chamber that holds water and hair.
3. Clear the trap
- Use a brush, gloved fingers, or a plastic scraper to remove hair and sludge.
- Rinse the trap with water and a little dish soap to wash away residue.
- If hair is stuck with soap scum, gently scrub; avoid harsh metal tools that can damage the trap finish.
4. Check upstream and downstream
- Look into the tailpiece above the trap and the drain inlet after removing the trap for any hair caught there.
- Run water while you reassemble to confirm the drain clears and there’s no leak at the slip nuts.
5. Reassemble and test
- Hand-tighten the slip nuts, then give a small additional quarter turn with pliers—don’t overtighten.
- Run hot water for a minute and check for slow flow or leaks.
6. Prevent future buildup
- Install a simple sink strainer or hair catcher if you don’t have one.
- Clean the trap periodically—every few months if you notice hair shedding.
- If you switched personal care products recently and suspect more soap scum, review product effects in Soap clog after switching shampoo.
What Not to Do
- Do not replace pipes before checking trap shape.
- Do not force metal tools or coat hangers deep into the drain; that can damage seals or push clogs further.
- Do not pour strong chemical drain cleaners into the trap while you’re working—chemicals can splash and cause burns or damage pipe finishes.
When to Call a Professional
- Repeated clogging after you’ve cleaned the trap and checked the trap shape.
- Visible leaks from trap fittings or corroded parts that won’t seal.
- Signs of a deeper line issue: gurgling drains, multiple fixtures slow at once, or sewer smell that returns quickly.
Safety Notes
- Always put a bucket under the trap to catch wastewater and protect flooring.
- Wear gloves and eye protection when handling dirty traps; wash hands thoroughly after the job.
- Avoid mixing chemical cleaners with physical cleaning—keep chemicals away while you open the trap.
Common Homeowner Questions
- Can I clean the trap myself? Yes — most traps are designed for homeowner removal with basic tools and a bucket.
- How often should I check the trap? Every 3–6 months if you shave or shed hair at that sink; sooner if you notice slow drainage.
- Will straining the drain eliminate the problem? Strainers reduce hair entry but you should still inspect the trap after any major shedding or blockage.