Quick Answer:
Shortly after a remodel the shower can start dripping because construction debris or a mis-seated part is preventing a tight seal. Start by removing and cleaning the showerhead and trim, then inspect the valve cartridge for caught debris or incorrect orientation if it was replaced. If simple cleaning and reseating don’t stop the drip, call a plumber.
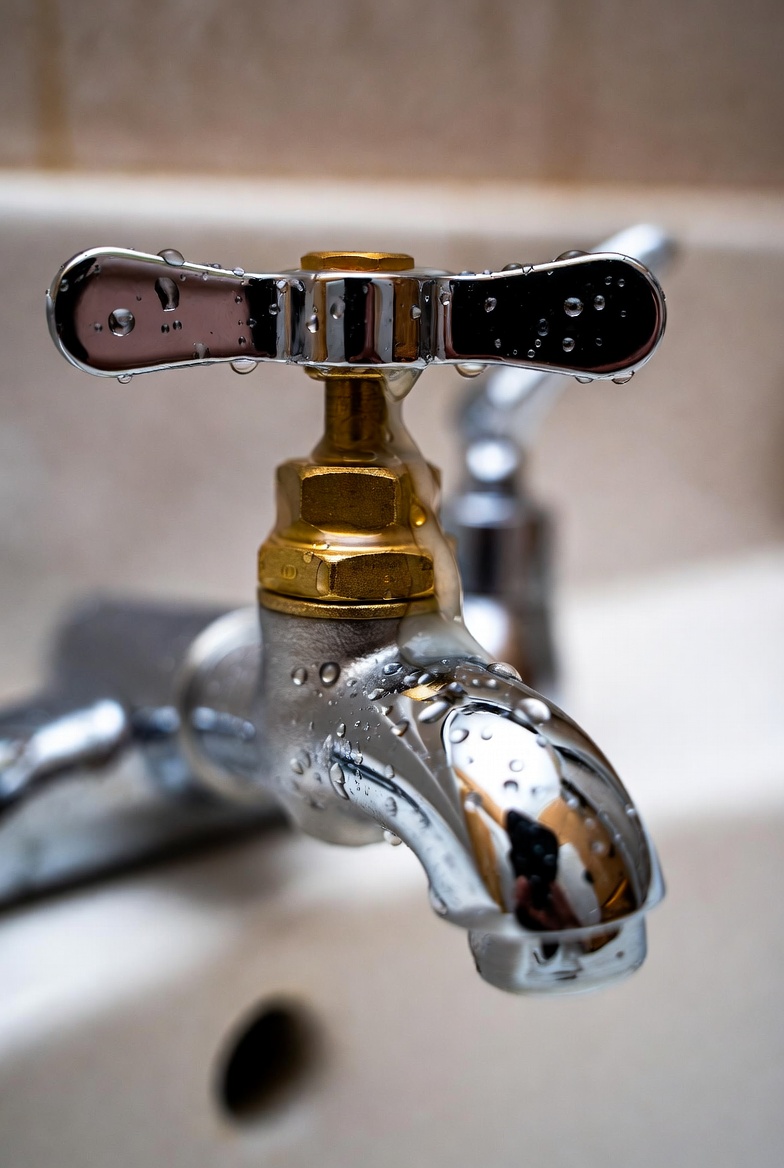
Why This Happens
- Remodel work (cutting, sanding, soldering, grout/caulk work) sends small particles into plumbing lines and fixtures. Those particles often lodge in the showerhead, the inlet screen, or the cartridge and prevent a full seal.
- A replaced valve or cartridge can be installed rotated the wrong way or not fully seated, keeping seals from compressing correctly.
- Heat from recent soldering or shifting during trim work can slightly move trim pieces or seals so they no longer compress as intended.
- If the problem only happens under certain conditions, check the related systems — for example, **Drip only after hot water use** or after add-ons like a filter, see **Dripping after filter install** for similar causes.
Step-by-Step What to Do
1. Prepare and shut off the water
- Turn off the shower shutoff or the home’s water supply if needed. If unsure where that is, shut off the main and open a faucet to relieve pressure.
- Place towels or a bucket under the work area to catch water and protect finishes.
2. Remove and clean the showerhead
- Unscrew the showerhead by hand or with a strap wrench to avoid marring the finish.
- Inspect the inlet screen (if present) and soak the head in a vinegar solution or use a soft brush to remove debris and mineral scale.
- Rinse thoroughly and reattach, then test for the drip before doing more work—sometimes a clogged screen or debris in the head is the whole issue.
3. Access and inspect the cartridge or valve
- Remove the handle and trim plate to expose the cartridge. Keep track of screws and parts.
- Look for debris, metal flakes, or sand in the valve area. Use a clean rag or low-pressure water to flush out loose material.
- If the cartridge was replaced during the remodel, confirm it is oriented correctly and fully seated before tightening any retaining clip or nut. Incorrect orientation commonly prevents seals from seating right.
4. Clean seals and re-seat parts
- Wipe O-rings and seals with a clean, lint-free cloth. Lightly lubricate silicone O-rings with a plumber-approved silicone grease if they look dry.
- Reinstall the cartridge straight and evenly. Reattach the trim and handle, restore water, and test carefully for leaks.
5. If it still drips
- Double-check for tiny debris still lodged in the seat or a damaged cartridge. Sometimes replacing the cartridge is the correct fix.
- Inspect for damage behind the valve or for a worn valve seat that won’t seal; these can require parts or professional repair.
What Not to Do
- Don’t accept remodel drips as “settling in.” Debris and mis-seating are common and fixable causes.
- Don’t force parts with pliers or use excessive heat or tools that can damage finishes, cartridges, or seals.
- Don’t leave the water on while you disassemble the valve—always isolate the supply first.
- If cleaning and reseating don’t stop the drip, don’t delay calling a plumber; continuing to run a leaking fixture can cause water damage.
When to Call a Professional
- The drip continues after removing debris, cleaning, and correctly reseating the cartridge.
- You find corrosion, a damaged valve seat, or you can’t locate an accessible shutoff to work safely.
- Water is leaking into the wall, ceiling, or causing visible water damage; these situations need prompt professional repair.
Safety Notes
- Always shut off the water supply before removing the cartridge or showerhead to avoid scalding or flooding.
- Be careful with hot-water lines if the remodel included plumbing or soldering. Let recently worked-on pipes cool before touching.
- Protect finishes by using strap wrenches and soft cloths when turning or removing fittings.
- If you smell gas or see major corrosion, stop and call a licensed professional—don’t try to force repairs in those cases.
Common Homeowner Questions
- Why did it start after the remodel? — Small particles from cutting, sanding, or soldering often enter fixtures and stop seals from seating.
- Can I fix it myself? — Yes for many cases: removing the head, cleaning, and reseating the cartridge often fixes a remodel-related drip.
- When should I call a plumber? — Call when cleaning and reseating don’t stop the drip, if you see water damage, or if you can’t access or shut off the supply safely.
For more related articles, see the Dripping Showerhead After Shutoff hub.