Quick Answer:
If a sink that worked before the remodel now backs up, likely causes are leftover debris, a shifted or sagging drain run, or a disturbed trap or vent. Start with basic checks — isolate the sink, clear the aerator and P‑trap, and Inspect visible drain sections for slope changes. If the problem continues or multiple fixtures are affected, call a plumber.
Why This Happens
Remodel work can disturb pipes, fittings and the venting system. Common reasons for a new backup include:
- Construction debris (sawdust, grout, drywall dust, packaging) left in the line.
- P-trap removed and reinstalled incorrectly or with a misaligned joint.
- A flexible or rerouted drain run with reduced pitch, allowing standing water and blockages.
- Vent obstruction from dust or work above the roof, slowing drainage and causing gurgling or slow sinks.
Remodels can also leave small particles that settle at low spots. Sometimes a surface change at the fixture (like a repositioned aerator) shows a problem that was always present. For clogs near the sink, check the aerator first, because repairs often dislodge material that lodges there.
Step-by-Step What to Do
Step 1 — Stop using the sink and isolate the issue
- Turn off water to the sink if you’re seeing leaks. Avoid running other fixtures to prevent pushing debris farther into the system.
- Check other nearby drains (bathroom, dishwasher, laundry) to see if the backup is limited to one sink or affects several fixtures.
Step 2 — Check and clean the aerator
- Unscrew the faucet aerator and inspect for debris. Small particles from remodeling commonly lodge here first.
- Clean the screen and re-test flow. If you see chunks or persistent blockage, the issue may be higher in the tailpiece or trap. See the note about Sink aerator clogs after repair.
Step 3 — Remove and inspect the P‑trap
- Place a bucket under the trap, loosen the slip nuts, and remove the trap to look for hair, drywall dust, or sediment.
- Rinse the trap and check the trap arm for visible blockages where you can reach.
- Reassemble carefully, hand‑tighten nuts, and test the drain.
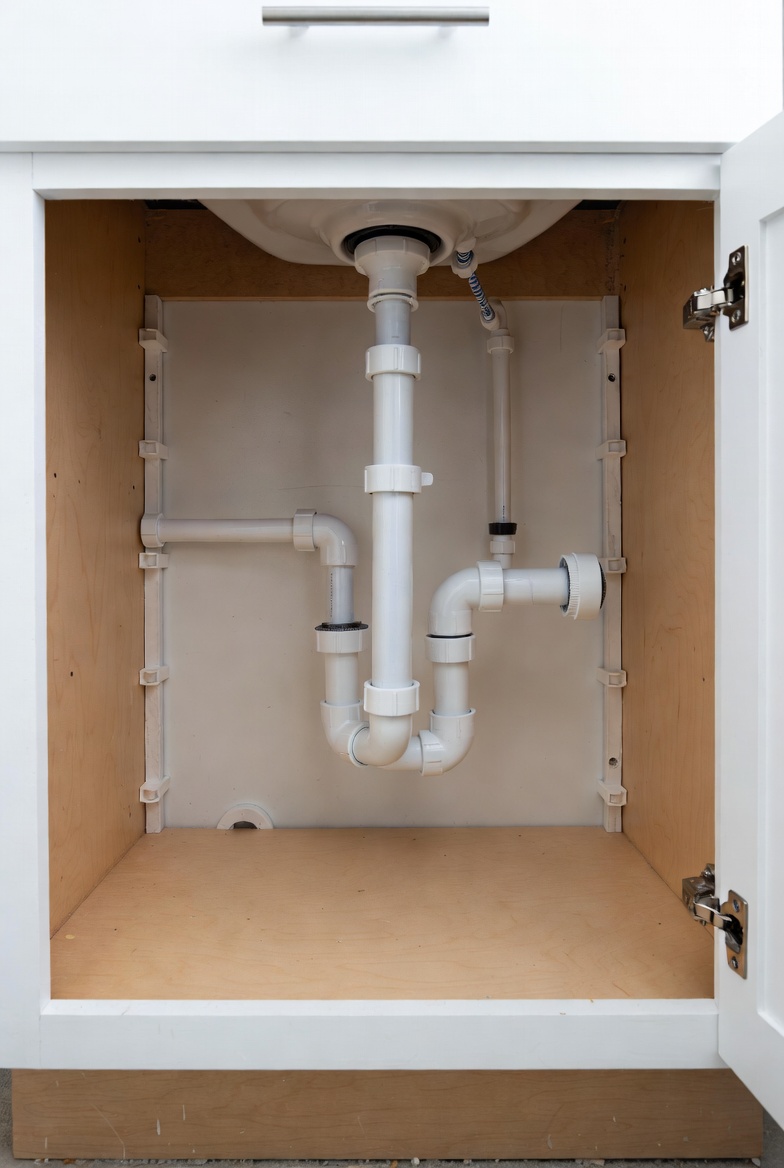
Step 4 — Inspect visible drain sections for slope changes
- Look along exposed sections of drain (under sink, in the cabinet, basement ceiling) for a smooth downhill slope toward the wall/drain. A sagging section makes a trap where debris collects.
- If a drain elbow or section was reinstalled with less pitch, it can slow flow and cause frequent backups.
Step 5 — Use a plunger or a small hand auger for deeper clogs
- Try a sink plunger (cup that seals over the drain) first. Work carefully and avoid excessive force that can loosen fittings.
- If needed, use a six-foot hand auger (plumber’s snake) to reach past the trap into the drain arm. Feed it slowly and retrieve debris rather than forcing it.
- Avoid pouring strong chemical drain cleaners — remodel debris often requires mechanical removal rather than chemistry.
Step 6 — Check the vent and cleanout
- If multiple fixtures are slow or you hear gurgling when one fixture drains, the vent may be obstructed by construction debris. A blocked vent can mimic a drain clog.
- Locate and open the building drain cleanout (if accessible) and inspect for obvious obstructions, or call a pro if you’re not comfortable opening it.
Step 7 — Test and monitor
- Run water for a few minutes to check for steady flow and to confirm the problem is resolved.
- If the sink still drains poorly or backs up intermittently, document when it happens and what you tried before calling a plumber.
What Not to Do
- Do not assume remodel debris cleared itself. Small particles often remain and settle in low spots.
- Don’t pour large amounts of chemical drain cleaner after construction — it can damage seals and harm you if mixed with other cleaning agents.
- Avoid cutting or forcing pipes back into place without support; improperly cut or sloped pipes can create long‑term drainage and leak problems.
When to Call a Professional
- Multiple fixtures are backing up or you smell sewage — this suggests a main line or vent problem.
- Visible pipe slope changed during remodel and you cannot correct it safely yourself.
- Leaks appear where pipes were moved, slip nuts won’t seal, or you can’t clear the clog with simple tools.
- Repeated backups after temporary fixes — persistent problems often need a camera inspection or re-pitching by a plumber. If in doubt, call a pro rather than causing further damage; see guidance on Sink drains worse after repair.
Safety Notes
- Wear gloves and eye protection when working under the sink or handling debris.
- Place a bucket under the trap and have towels ready for spills. Turn off water if a joint is leaking.
- Do not mix chemical cleaners. If you have already used chemicals, ventilate the area and avoid mechanical work until you know what chemicals were used.
- If you’re unsure how to reassemble plastic or PVC fittings, take a photo before disassembly so you can restore them correctly.
Common Homeowner Questions
- Why did the sink start backing up only after the remodel? — Work often dislodges debris or alters pipe alignment; those changes cause new clogs or slow flow.
- Can I fix this myself without a plumber? — Many simple clogs and trap issues can be cleared by a homeowner, but slope changes, main line backups, or vent problems usually need a pro.
- Is it safe to use a chemical drain cleaner after construction? — No. Chemical cleaners can damage plumbing seals and won’t reliably remove construction debris; mechanical cleaning is safer and more effective.
For more related articles, see the Post-Repair Sink Drain Problems hub.