Quick Answer:
If the trap looks crooked after a remodel, don’t ignore it. A shifted wall stub-out or a stretched trap arm can stress slip joints and seals, causing leaks or reduced flow. Start by visually confirming the remodel didn’t shift the wall stub-out or stress the trap alignment, then check for leaks and adjust the trap if it’s a slip-joint assembly. If the trap is glued, corroded, or you can’t get a good seal, call a plumber.
Why This Happens
Remodeling work can move the sink, change how the vanity sits, or shift drywall and tile around the drain opening. That can change the angle the trap arm must meet the wall stub-out. Forcing the trap into place or using the wrong trap length creates tension on slip joints and seals. Over time those stressed connections can loosen or crack. A misaligned trap can also trap debris unevenly; an **Improper trap causes slow drain** and gurgling if water no longer flows smoothly through the bend.
Step-by-Step What to Do
Gather what you need
- Bucket and rags or towels
- Flashlight
- Adjustable wrench or slip-joint pliers
- Tape measure
- Replacement slip washers or a replacement trap (if needed)
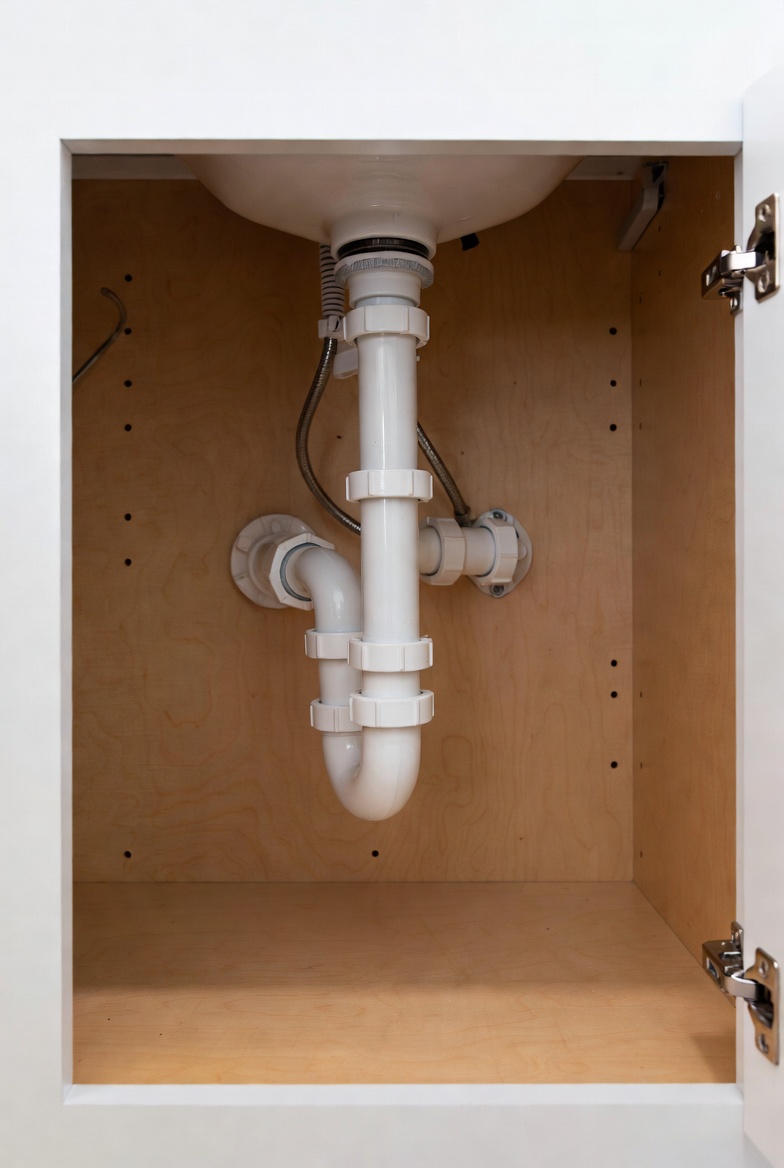
Visually inspect the stub-out and trap
- Remove any access panel or cabinet contents that block your view.
- Visually confirm the remodel didn’t shift the wall stub-out or stress the trap alignment. Look for gaps where the trap arm meets the wall flange, cracked plaster or tile, or a vanity that has been pushed against the trap.
- Note whether the trap is metal, PVC, or ABS; glued or solvent-welded traps cannot be simply rotated.
Check for leaks and flow
- Place the bucket under the trap and run water at full flow for a minute. Watch for drips at slip nuts, the trap bend, and the wall connection.
- Look inside the trap for hair or debris. A visible obstruction can reduce flow—see Trap blocks hair flow for more on cleaning and maintenance.
Realign the trap (if it’s a slip-joint trap)
- Support the trap with one hand, then loosen the slip nuts a turn or two. Don’t fully remove them unless you’re ready to replace the trap washer.
- Gently rotate and slide the trap so the trap arm enters the wall stub-out without bending. Aim for a straight run from the trap arm into the wall pipe with a slight downward slope toward the wall if possible.
- Hand-tighten the slip nuts, then snug them a bit more with pliers. Avoid overtightening; finger-tight plus a small turn is usually enough.
- If the trap is too short or too long, measure and replace it with the correct length or use a properly sized trap adapter rather than forcing a misfit.
Test and monitor
- Run water and check for leaks. Wipe joints dry and check again after 10–15 minutes.
- Check again over the next 24–48 hours for slow seepage. If a joint keeps leaking or the trap re-shifts, the stub-out or the trap may be damaged or improperly installed.
What Not to Do
- Do not ignore a trap that is misaligned after a remodel; stressed joints can fail suddenly.
- Don’t force a trap into place or overtighten metal slip nuts to “make it fit” — that breaks threads or cracks plastic parts.
- Don’t cut or glue pipes unless you know the material and proper method; glued joints are permanent and may require replacing parts you didn’t plan for.
- Don’t rely on chemical drain cleaners to correct alignment or mechanical blockages; they won’t fix a stressed joint and can damage some plastics.
When to Call a Professional
- Leaks persist after you’ve realigned and tightened the trap.
- The trap or wall stub-out is corroded, cracked, glued, or otherwise damaged.
- There’s evidence of water damage behind the wall or under the cabinet, or you detect sewer smell that won’t clear.
- You’re uncomfortable removing or replacing parts, or the drain uses unusual fittings or materials.
Safety Notes
- Wear gloves when handling a trap—there can be sewage residue or sharp edges.
- Keep a bucket and towels handy to catch spills. Clean up wastewater promptly.
- Avoid inhaling fumes from solvent cements or harsh cleaners. If those are needed, use proper ventilation and personal protective equipment.
- If you see mold, electrical hazards, or extensive rot, stop and call a professional—those issues go beyond a simple trap realignment.
Common Homeowner Questions
- Will a crooked trap always leak? Not always, but misalignment increases the risk of leaks and joint failure over time.
- Can I fix a misaligned trap myself? Often yes for slip-joint traps—loosen, realign, and retighten—but glued or corroded systems may need a pro.
- How long should I watch for leaks after fixing it? Check immediately, then again at 24 and 48 hours; slow leaks can show up after repeated use.
For more related articles, see the P-Trap Geometry & Improper Slope Issues hub.