Bottom Line Up Front Whole-house low pressure right after a main shutoff or valve replacement is most often caused by debris trapped in the new valve, a partially closed or reversed valve, air pockets, or a restriction at the meter/PRV. Measure static pressure at an outdoor hose bib, isolate zones to pinpoint the block, and flush the system thoroughly. These three steps identify 90% of post-replacement issues quickly. If pressure stays low or you see leaks, call a licensed plumber or your utility immediately.
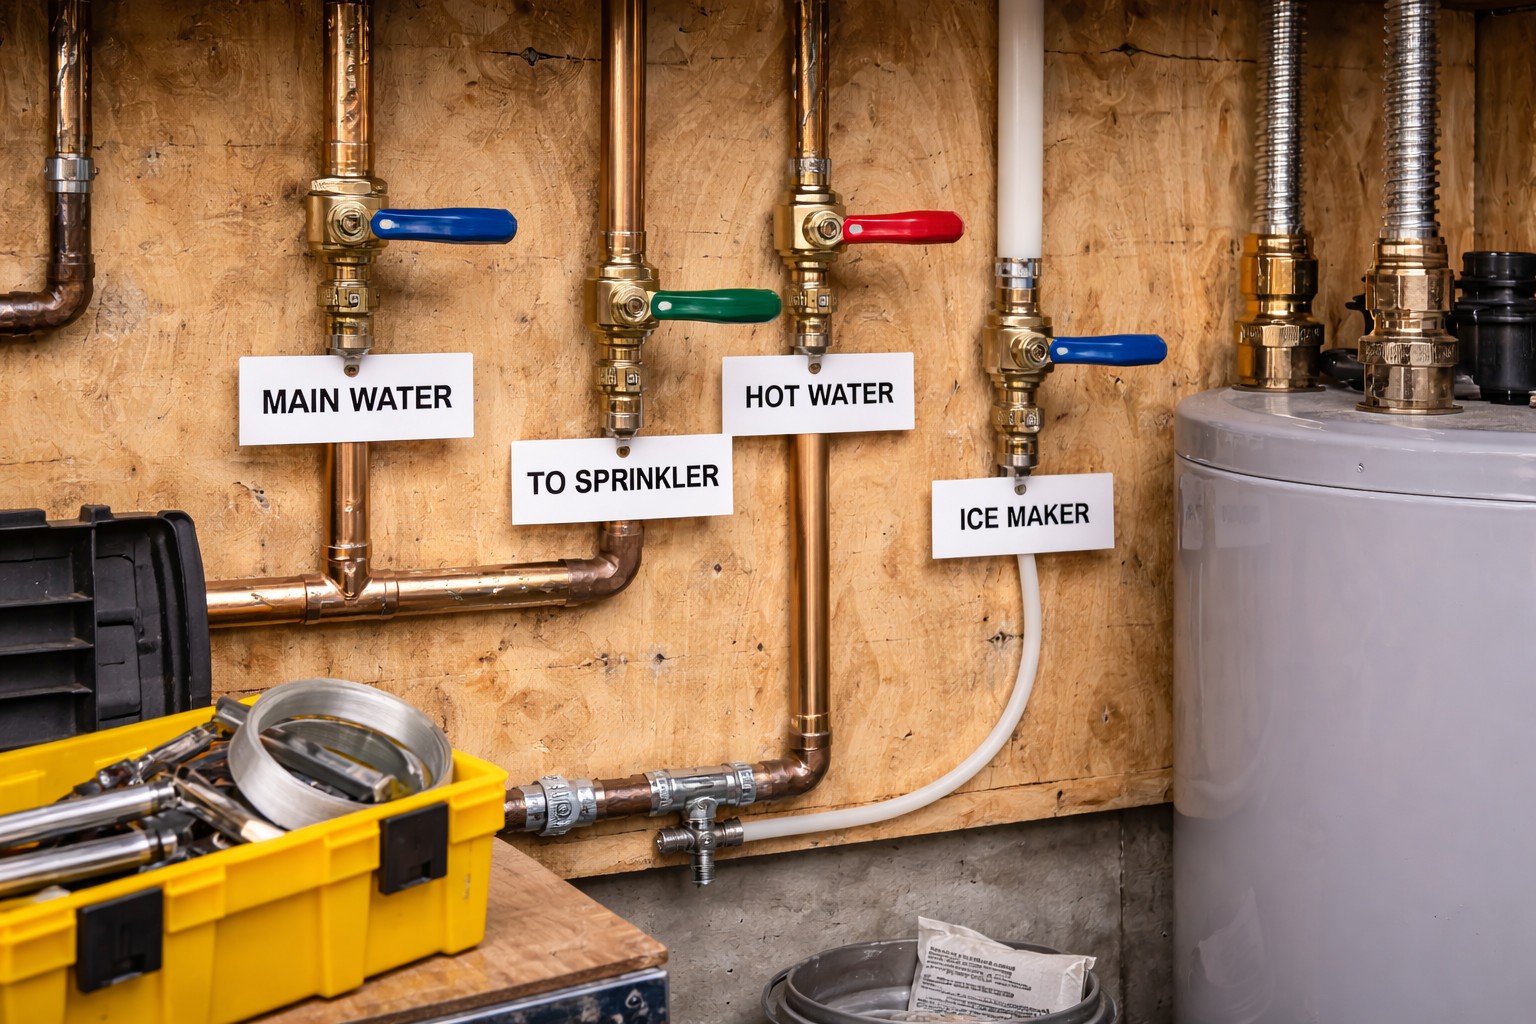
Common Causes Replacing or working on the main valve disturbs the plumbing system and can introduce restrictions or temporary flow issues. The most frequent culprits include:
- Debris or mineral scale lodged in or just downstream of the new valve during installation.
- New valve installed backward, partially closed, or with a faulty seal.
- Stuck or clogged pressure-reducing valve (PRV), meter screen, or backflow preventer.
- Air pockets trapped in lines after refilling — often causing temporary low flow that improves as air works out (House pressure slowly recovers after use in some systems).
- Utility-side issues (reduced pressure, damaged service line during work) or a closed isolation valve farther in the house.
If pressure is normal at the service entry but low at fixtures, the problem is downstream. If low everywhere, it’s upstream (meter, PRV, valve).
Tools & Materials You’ll Need
- Water pressure gauge (screw-on for hose bib, $10–20 at hardware stores)
- Flashlight (to inspect valves/meter)
- Bucket/towels (for drips during checks)
- Adjustable wrench (for gauge or valve access)
- Safety gloves and glasses
Step-by-Step Troubleshooting & Fixes
Step 1: Measure Static Pressure at Hose Bib
- Attach gauge to an outdoor hose bib (closest to main supply, not a branch line).
- Turn off all indoor fixtures, open the bib slightly to stabilize flow, and read static pressure (normal: 50–70 psi).
- Low at bib → issue upstream (valve, meter, PRV, service line).
- Normal at bib but low at fixtures → issue downstream (distribution pipes, clogged aerators).
Step 2: Isolate & Test Main Components
- Check house-side main shutoff — ensure fully open (not partially closed or reversed).
- Inspect meter and any backflow preventer — look for visible clogs or damage (don’t tamper with utility meter).
- If PRV present, note its setting; test bypassing temporarily (if safe and you understand the system) to see if pressure improves.
- Close/open zone valves (if any) and test pressure/flow in each area.
Step 3: Flush the System Thoroughly
- Start at lowest fixture (basement hose bib or drain), run full cold water.
- Open high indoor tap (shower/attic sink) to create full flow-through.
- Flush 5–10 minutes — may clear debris/air (Pressure improves when multiple taps open in some cases).
- Re-measure pressure at hose bib after flush.
Step 4: Check Hot Water & Other Fixtures
- Run hot taps — note if pressure is worse (heat can amplify restrictions).
- Test multiple cold/hot fixtures — helps isolate location.
Step 5: Decide Next Steps
- Pressure normal after flush → Monitor; resume use.
- Still low → Stop non-essential use; contact utility (service line/meter?) or plumber (valve/PRV/pipes?).
Mistakes to Avoid
- Don’t force valves or fittings — can damage seals/threads.
- Don’t tamper with utility meter or PRV without guidance — may void warranties or cause leaks.
- Don’t replace fixtures without confirming supply pressure is normal first.
When to Call a Professional
- Static pressure low at hose bib after checks/flush.
- Leaks, wet spots, or sudden pressure drop during testing.
- Valve installed incorrectly, meter/PRV issue, or service line damage suspected.
- You’re unsure about gauge readings, valve inspection, or safety.
Safety First
- Relieve pressure before removing gauge or fittings to avoid spray.
- Use gloves/eye protection when flushing or working near valves.
- If hot water involved, avoid scalding — test cold first.
- This is general DIY guidance — plumbing varies; consult utility or licensed pro when in doubt.
Readers Also Ask Why does pressure feel better when multiple taps open? Multiple outlets can change flow dynamics and bypass localized restrictions — helps diagnose location.
How long should flushing take? 5–10 minutes at low and high points; longer if water remains discolored or low pressure persists.
Will trapped air fix itself? Sometimes after a few uses, but if pressure stays low, flushing + isolation checks are needed.
Related Articles If you’re troubleshooting similar symptoms, these guides may help:
- Metallic taste in tap water
- Copper taste after pipe replacement
For more related articles, see the Whole-House Low Water Pressure hub.
Disclaimer: This content is for informational purposes only and not a substitute for professional plumbing advice. Attempting repairs can cause damage or injury—proceed at your own risk and call a licensed plumber when in doubt.